
Do you ever feel a little stuck when your Raspberry Pi is doing its thing in a corner, maybe running a smart home gadget or a weather station, and you just wish you could peek at it without hooking up a monitor and keyboard? Well, you are not alone, and there is a really good way to handle that. This whole idea of controlling your little computer from afar, like from your main desktop or even a tablet, is what we are going to talk about today. It is about making your projects, especially those in the world of IoT, much easier to manage, and it can be done with tools that cost you nothing at all.
The Raspberry Pi, you know, it is a truly amazing little machine, used by so many people. It goes from big companies in industries to the person just starting out at their kitchen table, and even to students in classrooms learning to code. Raspberry Pi Holdings PLC, they make computing something everyone can get into, and it is also very kind to your wallet. This accessibility is a big part of why these small computers are so popular for all sorts of projects, particularly when you are building something that needs to be out of the way, but still needs you to check on it or make changes.
So, we are going to explore how you can use a free VNC viewer with your Raspberry Pi for your Internet of Things (IoT) creations. This setup lets you see the graphical desktop of your Raspberry Pi right on another computer, as if you were sitting right in front of it. It is a very practical approach, and it means you can keep your Raspberry Pi tucked away, perhaps controlling some lights or monitoring a garden, and still have full control. It is, you know, a very neat trick for anyone working with these tiny, powerful devices, and it saves a lot of hassle.
Table of Contents
- Why Remote Access Matters for IoT with Raspberry Pi
- Getting Your Raspberry Pi Ready for VNC
- Finding and Using a Free VNC Viewer
- Common Challenges and Simple Solutions
- Frequently Asked Questions About VNC and Raspberry Pi
- Making the Most of Your IoT Projects
Why Remote Access Matters for IoT with Raspberry Pi
When you are building something with IoT, the devices often need to be in places that are not always convenient for you to reach. Perhaps your Raspberry Pi is running a security camera in the garage, or it is collecting data from sensors out in the garden. In these situations, physically connecting a screen and a keyboard every time you need to check something or make a small change is, you know, quite a bit of work. This is where the ability to access your Raspberry Pi from another computer, using something like a VNC viewer, becomes very, very useful.
The Power of Raspberry Pi for IoT
The Raspberry Pi is a really popular choice for IoT projects, and that is for some good reasons. For one thing, it is small, which means it can fit into tight spaces. Also, it does not use a lot of power, which is pretty important for devices that might need to run for a long time. Plus, it has these things called GPIO pins, which let you connect all sorts of sensors and actuators, making it very versatile for controlling physical things. The Raspberry Pi Foundation, they are a charity with a mission to help young people reach their full potential through computing and digital technologies, and they provide so many free online coding resources and challenges, available for everyone, anywhere. This support makes it even easier to get started with IoT.
You can learn coding for kids, teenagers, and young adults, and even get started with your Raspberry Pi computer for free. The foundation helps you write powerful programs and build exciting physical computing projects with their team of expert educators. This means you have a lot of help available to you as you build your IoT creations. Whether you are learning Python for free with the Raspberry Pi Foundation or taking an online computing class, the resources are there. So, with all this going for it, the Raspberry Pi is, more or less, a perfect brain for many IoT applications, and being able to access it remotely just makes it even better.
What is VNC and How It Helps
VNC, which stands for Virtual Network Computing, is a system that lets you control one computer from another. It basically sends the screen display of one computer over a network to another computer, and it sends your mouse and keyboard inputs back. For your Raspberry Pi IoT projects, this means you can see the graphical desktop of your Pi, just as if you were looking at a monitor connected directly to it. This is a big deal because it lets you run programs, change settings, or check on your sensors without needing to move your Pi or plug anything into it. It is, you know, a very convenient way to interact with your projects.
This kind of remote access is pretty essential for IoT devices. Imagine you have a Raspberry Pi controlling the temperature in your greenhouse, and you want to adjust the settings without having to walk all the way out there. With VNC, you can just open a program on your laptop, connect to the Pi, and make the changes right from your desk. It is, in some respects, like having a remote control for your Pi's entire operating system. This freedom really helps when your projects are spread out or are in hard-to-reach spots, making VNC a truly valuable tool for anyone serious about IoT.
Getting Your Raspberry Pi Ready for VNC
Before you can start controlling your Raspberry Pi from afar, you need to set up the Pi itself to allow for VNC connections. This usually involves making sure you have the right operating system and then installing some software that acts as a VNC server. This server software is what sends the Pi's screen output to your other computer and receives your commands. It is not too hard to do, and once it is set up, you will be able to connect whenever you need to, which is pretty handy.
Setting Up Raspberry Pi OS
First things first, you need to have Raspberry Pi OS installed on your Raspberry Pi. This is the official operating system, and it is what most people use. If you are just getting started, Raspberry Pi Imager is the quick and easy way to install Raspberry Pi OS and other operating systems to a microSD card, ready to use with your Raspberry Pi. You just download the imager, pick your OS, and write it to the card. It is a very straightforward process, and it sets the foundation for everything else you will do with your Pi, including setting up VNC.
Once you have Raspberry Pi OS running, you might want to make sure it is all up to date. You can do this by opening a terminal window on your Raspberry Pi and typing a couple of commands: `sudo apt update` and then `sudo apt full-upgrade`. This makes sure all your software is the latest version, which is always a good idea for security and performance. It is, you know, a basic step, but it is important for a smooth experience. You want everything to be current, as a matter of fact, before you add new things.
Installing the VNC Server
Many versions of Raspberry Pi OS actually come with a VNC server pre-installed, often RealVNC Connect. If it is not there, or if you prefer a different one, you can install it yourself. RealVNC Connect is a very popular choice because it is quite robust and offers good performance. You can find official documentation for Raspberry Pi computers and microcontrollers, which often includes details on setting up VNC. It is a very helpful resource, and it gives you step-by-step instructions.
To get RealVNC Server running, you usually just need to enable it through the Raspberry Pi Configuration tool, which you can find in the Preferences menu. Just go to Interfaces and make sure VNC is enabled. If you need to install it from scratch, or if you are looking for an alternative like XRDP, you might use a command like `sudo apt install realvnc-vnc-server` in the terminal. Speaking of XRDP, one of my text sources mentions a common issue: "Just install xrdp using a new install of raspberry pi os, Install xrdp using sudo apt install xrdp, and then we i try to login gets a black screen. Any solution out there to make it." This is a known problem for some users, and often, the solution involves checking display settings or using a different VNC server if XRDP causes issues. For most users, sticking with RealVNC, which is often integrated, is usually the easiest path, it seems.
After you have the VNC server installed and enabled, you will want to know your Raspberry Pi's IP address. You can find this by typing `hostname -I` in the terminal. This IP address is what you will use to connect to your Pi from your other computer. It is, you know, the address that tells your VNC viewer where to find your Raspberry Pi on the network. Without it, you cannot really make the connection, so it is quite important, actually.
Finding and Using a Free VNC Viewer
Once your Raspberry Pi is ready to accept VNC connections, the next step is to get a VNC viewer for the computer you want to control it from. There are many free VNC viewer programs available for different operating systems, whether you use Windows, macOS, Linux, or even a smartphone. The key is to pick one that is reliable and easy to use. The good news is that there are plenty of options that will not cost you anything, which is pretty great, you know.
Popular Free VNC Viewer Options
For Windows, macOS, and Linux, RealVNC Viewer is a very common and recommended choice. It is made by the same company that makes the RealVNC Server often found on Raspberry Pi OS, so they tend to work very well together. You can download it directly from the RealVNC website. It is, in a way, designed to be simple to use, and it usually just works. There are also other free options like TightVNC Viewer or UltraVNC Viewer for Windows, but RealVNC is a very solid starting point, typically.
If you are looking to control your Raspberry Pi from a mobile device, like an Android phone or an iPhone, there are also free VNC viewer apps available in their respective app stores. Just search for "VNC Viewer" and you will find several options. These apps are super convenient because they let you check on your IoT projects even when you are not near your main computer. It is, you know, a very flexible way to stay connected, and it gives you quite a bit of freedom, apparently.
Connecting to Your Raspberry Pi
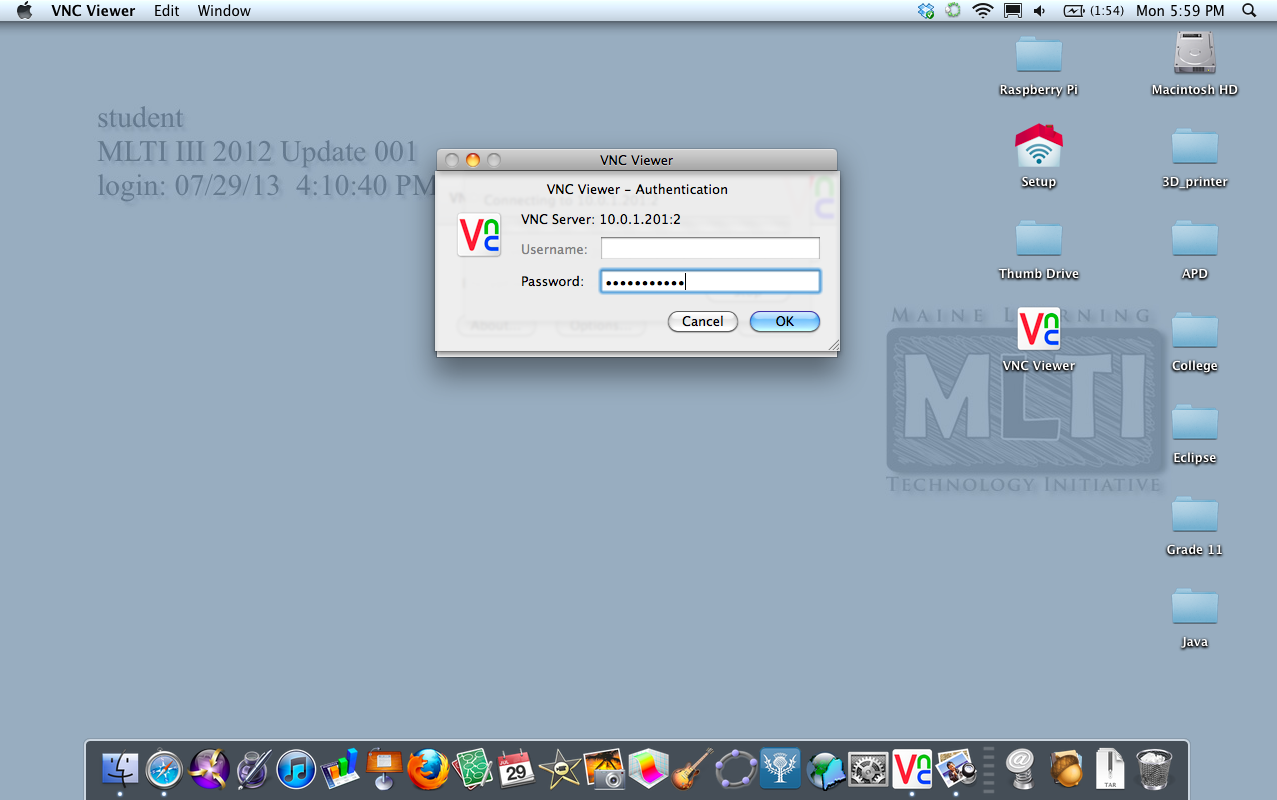
With your chosen VNC viewer installed, connecting to your Raspberry Pi is usually a simple process. You will open the VNC viewer program and it will ask for the IP address of the Raspberry Pi you want to connect to. This is that IP address you found earlier using `hostname -I`. You will enter that address, and then the viewer will likely ask for a password. This password is set up on your Raspberry Pi during the VNC server configuration. Once you enter the correct password, you should see the desktop of your Raspberry Pi appear in the viewer window. It is, basically, like magic, but it is just good technology.
Sometimes, if you are connecting from outside your home network, you might need to do a little more setup, like port forwarding on your router. However, for most home IoT projects, where your Raspberry Pi and your control computer are on the same network, it is often as straightforward as just entering the IP address and password. This makes the whole process very accessible for people who are just starting out with IoT and remote access. It is, you know, a pretty quick way to get things going, more or less.
Common Challenges and Simple Solutions
While setting up VNC for your Raspberry Pi is often smooth, you might run into a few common issues. One problem people sometimes face is not being able to connect, or getting a black screen, as mentioned in the text about XRDP. This can happen for a few reasons. Sometimes, the VNC server might not be running on the Raspberry Pi, or the firewall on either the Pi or your router might be blocking the connection. It is, you know, something that happens, but it usually has a simple fix.
A good first step for troubleshooting is to make sure the VNC server is definitely running on your Raspberry Pi. You can check its status from the terminal. Also, double-check that you have the correct IP address for your Pi. Network issues, like your Raspberry Pi not being on the same Wi-Fi network as your viewing computer, can also cause problems. Sometimes, just restarting both your Raspberry Pi and your viewing computer can clear things up. It is, as a matter of fact, a bit like turning it off and on again, which often works for many computer problems.
Another thing to consider is the display resolution. If you are getting a strange-looking desktop, or if it feels slow, you might need to adjust the resolution settings on your Raspberry Pi for the VNC connection. This can usually be done through the VNC server's settings. Keeping your Raspberry Pi OS updated, as mentioned earlier, can also prevent many issues, as updates often include bug fixes and improvements for things like VNC. It is, you know, a pretty good habit to keep everything current, and it helps a lot, usually.
Frequently Asked Questions About VNC and Raspberry Pi
People often have questions when they are getting started with VNC and their Raspberry Pi. Here are some common ones that come up, just to help you out.
Is VNC free for Raspberry Pi?
Yes, absolutely. The RealVNC Server, which is often included with Raspberry Pi OS, and many VNC viewer applications for your desktop or mobile device, are available at no cost. The Raspberry Pi Foundation, as you know, provides access to online coding resources and challenges that are free for everyone anywhere, and this philosophy extends to many of the tools you will use with your Pi. So, yes, you can definitely set up remote access using VNC without spending any money, which is pretty nice, you know.
How do I remotely access my Raspberry Pi from anywhere?
Accessing your Raspberry Pi from anywhere, not just your home network, typically involves a few more steps. The easiest way for many people is to use the cloud connectivity features that some VNC services, like RealVNC Connect, offer. This usually involves signing up for a free account with the VNC provider and linking your Raspberry Pi to it. This method helps you avoid complex network setups like port forwarding. Alternatively, you could set up a VPN (Virtual Private Network) to securely connect to your home network, and then access your Pi as if you were at home. It is, you know, a bit more involved, but it gives you a lot of flexibility, essentially.
What is the best VNC viewer for Raspberry Pi?
For most users, RealVNC Viewer is generally considered a top choice, especially since RealVNC Server is often the default or recommended VNC server on Raspberry Pi OS. They are designed to work together very well, offering good performance and ease of use. However, "best" can depend on your specific needs. Other free options like TightVNC Viewer or UltraVNC Viewer might be preferred by some for particular reasons. For mobile devices, the official RealVNC Viewer app is also a strong contender. It is, you know, mostly about what feels right for you, but RealVNC is a very solid starting point, pretty much.
Making the Most of Your IoT Projects
Using a free VNC viewer with your Raspberry Pi for IoT projects really opens up a lot of possibilities. It means your projects can be more independent, placed where they need to be, without you having to constantly move things around or plug in extra equipment just to check on them. This remote access is a pretty big step in making your IoT ideas more practical and more integrated into your daily life. It is, you know, about making things easier for you, and that is a very good thing.
The Raspberry Pi Foundation continues to support learning and innovation, offering resources to help you learn electronics and robotics for free online. You can build exciting projects and control them with your computer, and VNC is just one tool that helps you do that more effectively. Whether you are creating smart home devices, environmental monitors, or anything else, the ability to control and monitor your Raspberry Pi remotely is a powerful advantage. So, give it a try, and see how much more you can do with your tiny computers. You can learn more about our resources on our site, and if you are interested in further study or preparing for the modern workforce, you can also check out our new certificate in applied computing, which equips students with essential digital skills.


Detail Author:
- Name : Mason Littel
- Username : velma.schultz
- Email : berge.novella@heathcote.org
- Birthdate : 2001-08-19
- Address : 6686 Bechtelar Underpass Apt. 691 Willton, AK 89861
- Phone : +18727604026
- Company : Stracke, Hessel and Bahringer
- Job : Motorcycle Mechanic
- Bio : Non id ut sed est dolorem tempore itaque. Molestiae in dolor iure ratione ex minus facilis. Debitis a sapiente est est enim facere rem. Ut dolorem culpa repudiandae nostrum eum voluptas quaerat.
Socials
instagram:
- url : https://instagram.com/cody_xx
- username : cody_xx
- bio : Voluptatum rerum totam ea delectus repellat voluptas est. Et consequatur rerum beatae blanditiis.
- followers : 2191
- following : 2144
twitter:
- url : https://twitter.com/cody_jakubowski
- username : cody_jakubowski
- bio : Ea dolor aut iure voluptate quia. Repellendus est aut fugiat accusantium deserunt quos. Est voluptate omnis dolorum reprehenderit nam qui quidem.
- followers : 1226
- following : 2118
