
Imagine being able to work on your Raspberry Pi from anywhere, without needing a monitor, keyboard, or mouse right there. It's a pretty neat idea, isn't it? For many folks who use these little computers, having remote access is a real game-changer, especially when your Pi is tucked away somewhere, perhaps running a home automation system or acting as a small server. Getting that visual desktop experience remotely, as a matter of fact, can make managing your projects so much easier.
VNC, which stands for Virtual Network Computing, lets you see and control your Raspberry Pi's desktop from another computer or even a phone. It's like you're sitting right in front of it, even if you're miles away. This kind of access is very handy for setting things up, checking on processes, or just tinkering with your Pi without having to physically connect a display.
However, just like leaving your front door open, connecting to your Pi without thinking about security can leave it vulnerable. This article will walk you through how to set up VNC on your Raspberry Pi, making sure your connection is safe and sound. We'll explore the steps needed to keep your projects and data protected, so you can connect with confidence, you know.
Table of Contents
- Why Secure VNC Matters for Your Raspberry Pi
- Getting Your Raspberry Pi Ready for VNC
- Installing and Setting Up VNC Server
- Connecting Securely with SSH Tunneling
- Other Security Measures to Consider
- Common Questions About Secure VNC on Raspberry Pi
- Wrapping Things Up
Why Secure VNC Matters for Your Raspberry Pi
When you open up a way to connect to your Raspberry Pi remotely, you're also opening a potential door for others. VNC itself, by default, might not have the strongest security features built in. This means that if someone were to guess your password or exploit a weakness, they could get access to your Pi. That's a bit worrying, especially if your Pi handles personal information or controls important devices in your home, you know?
Think about it: your Raspberry Pi could be storing files, running programs, or even managing your smart home gadgets. If an unauthorized person gains access, they could mess with your files, launch harmful software, or even use your Pi to attack other systems. So, making sure your VNC connection is secure isn't just a good idea; it's practically essential for keeping your digital life safe. It's really important, too, that we make these connections as safe as possible.
Getting Your Raspberry Pi Ready for VNC
Before we jump into setting up VNC, there are a couple of things you should do on your Raspberry Pi. These steps help make sure everything runs smoothly and securely from the very beginning. It's a bit like preparing your workspace before starting a big project, actually.
Update Your System First
Always start by making sure your Raspberry Pi's operating system is completely up-to-date. This helps you get the latest features, fixes, and, most importantly, security patches. Outdated software can have known weaknesses that bad actors might try to use. To update, you'll need to open a terminal window on your Pi. Then, you can type in a couple of commands.
First, update the list of available packages:
sudo apt updateAfter that, upgrade all your installed packages to their newest versions:
sudo apt full-upgrade -yThis process might take a little while, depending on how long it's been since your last update. It's a pretty good idea to do this regularly, in fact.
Enable SSH for Secure Tunneling
SSH, or Secure Shell, is a very important tool for secure remote access. It creates an encrypted connection between your computer and your Raspberry Pi. We'll use SSH to create a secure tunnel for our VNC traffic, which means the VNC data itself won't be directly exposed to the internet. If you haven't enabled SSH already, you can do so easily. You can enable it through the Raspberry Pi configuration tool.
Open the configuration tool by typing:
sudo raspi-configOnce the menu appears, use your arrow keys to go to 'Interface Options' and then select 'P2 SSH'. Choose 'Yes' to enable it. You'll get a confirmation message once it's done. This step is honestly quite straightforward.
Alternatively, if you're setting up a new Pi and want to enable SSH headless, you can create an empty file named `ssh` (no extension) in the boot directory of your SD card before you first boot the Pi. This tells the Pi to enable SSH automatically. It's a neat trick for quick setups, you know.
Installing and Setting Up VNC Server
Now that your Raspberry Pi is ready, it's time to get the VNC server software installed. There are a few VNC server options out there, but RealVNC Connect is often recommended because it's well-integrated with Raspberry Pi OS and offers good features. It's what we'll focus on here, too.
Installing RealVNC Server
RealVNC Server usually comes pre-installed on the desktop version of Raspberry Pi OS. If you're using a lite version or it's not there for some reason, you can install it. Just open a terminal window and type:
sudo apt install realvnc-vnc-server realvnc-vnc-viewerThis command installs both the server software for your Pi and the viewer software, just in case you want to connect from your Pi to another computer. Once installed, the VNC server typically starts automatically when your Pi boots up. You can check its status, if you want, with this command:
sudo systemctl status vncserver-x11-serviced.serviceYou should see that it's "active (running)". If it's not running, you can start it with `sudo systemctl start vncserver-x11-serviced.service`. It's pretty simple to manage, actually.
Configuring VNC Server for a Desktop Session
For RealVNC Server to work properly, especially for a desktop experience, you might need to make sure the desktop environment is running when you connect. When you're using a Pi without a monitor, sometimes the graphical interface doesn't start automatically in the same way. RealVNC handles this pretty well, but it's good to be aware. You'll also need to set a VNC password.
The first time you connect, or if you access the VNC Server settings directly on the Pi, you'll be prompted to set a password. This password is for the VNC connection itself, separate from your Pi's user password. Make sure it's a very strong password, combining letters, numbers, and symbols. This is a very important step for security, you know.
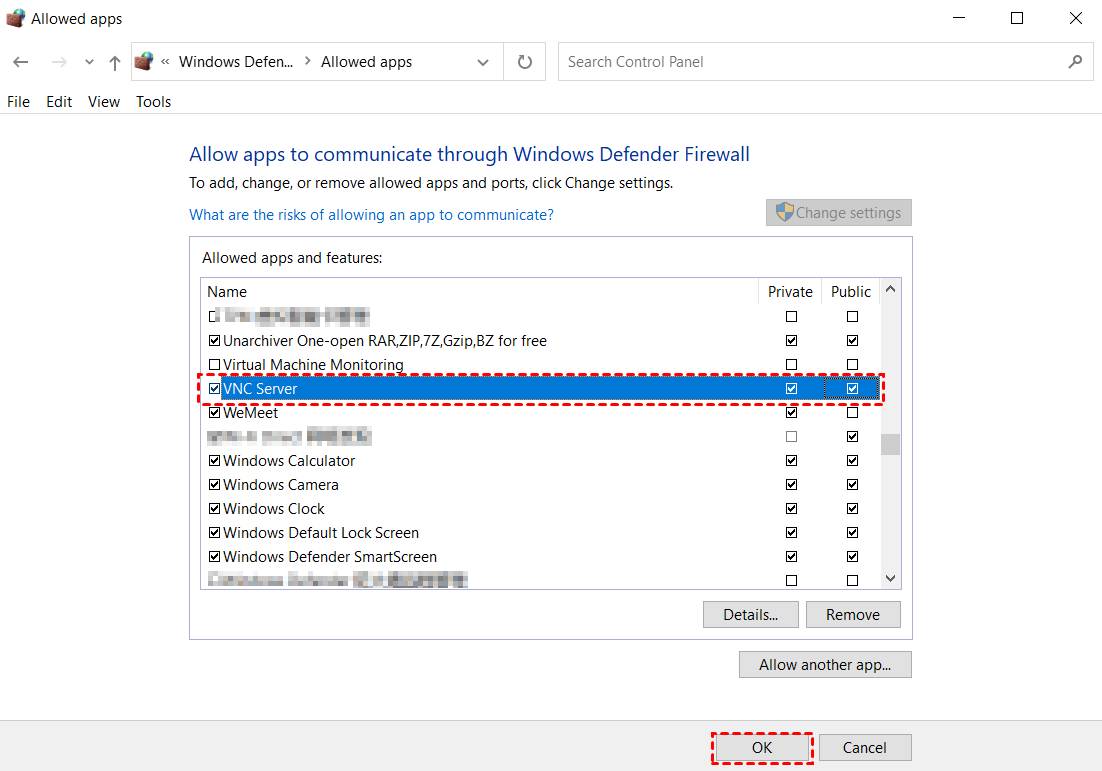
You can also access the VNC Server settings from the Raspberry Pi desktop environment. Look for the VNC icon in the top right corner of the screen (it looks like a black square with a white V). Clicking on it will open a window where you can adjust settings, like encryption and authentication methods. For the most secure setup, we'll rely on SSH tunneling, but these settings are still good to know about. It's pretty handy to have these options.
Connecting Securely with SSH Tunneling
This is where the "securely" part really comes into play. Instead of connecting directly to the VNC server, which might send data unencrypted, we'll create an SSH tunnel. This tunnel acts like a private, encrypted pipe through which your VNC traffic will flow. It's a bit like having a secret, protected pathway for your data, more or less.
Understanding SSH Tunnels
An SSH tunnel basically redirects network traffic from one port on your local computer to a port on your remote Raspberry Pi, all while encrypting it. So, when your VNC Viewer tries to connect to a local port (say, 5900), the SSH tunnel catches that traffic, encrypts it, sends it over the secure SSH connection to your Pi, and then delivers it to the VNC server on the Pi's VNC port (which is usually 5900 as well). This means your VNC connection is protected by the strong encryption of SSH. It's a very clever way to keep things private, you know.
Setting Up the SSH Tunnel on Your Computer
The command to create an SSH tunnel depends on your operating system. You'll need an SSH client on your computer. macOS and Linux have SSH built-in. For Windows, you might use PowerShell, Windows Terminal, or a tool like PuTTY.
Open your terminal or command prompt and use a command similar to this:
ssh -L 5900:localhost:5900 pi@your_raspberry_pi_ip_addressLet's break that down a bit:
- `ssh`: This calls the SSH client.
- `-L 5900:localhost:5900`: This is the crucial part for the tunnel.
- The first `5900` is the port on your *local computer* that the VNC Viewer will connect to.
- `localhost`: This means the VNC Viewer will think it's connecting to a VNC server on your own computer.
- The second `5900` is the port on the *Raspberry Pi* where the VNC server is listening.
- `pi@your_raspberry_pi_ip_address`: This is your Raspberry Pi's username (usually 'pi') and its IP address on your local network. You'll need to replace `your_raspberry_pi_ip_address` with the actual IP address of your Pi.
After you run this command, you'll be prompted for your Raspberry Pi's password. Once you enter it, the SSH tunnel will be established. Keep this terminal window open; closing it will close the tunnel. It's a pretty simple command once you get the hang of it, actually.
For more detailed information on SSH and how it works, you can learn more about secure shell connections on our site.
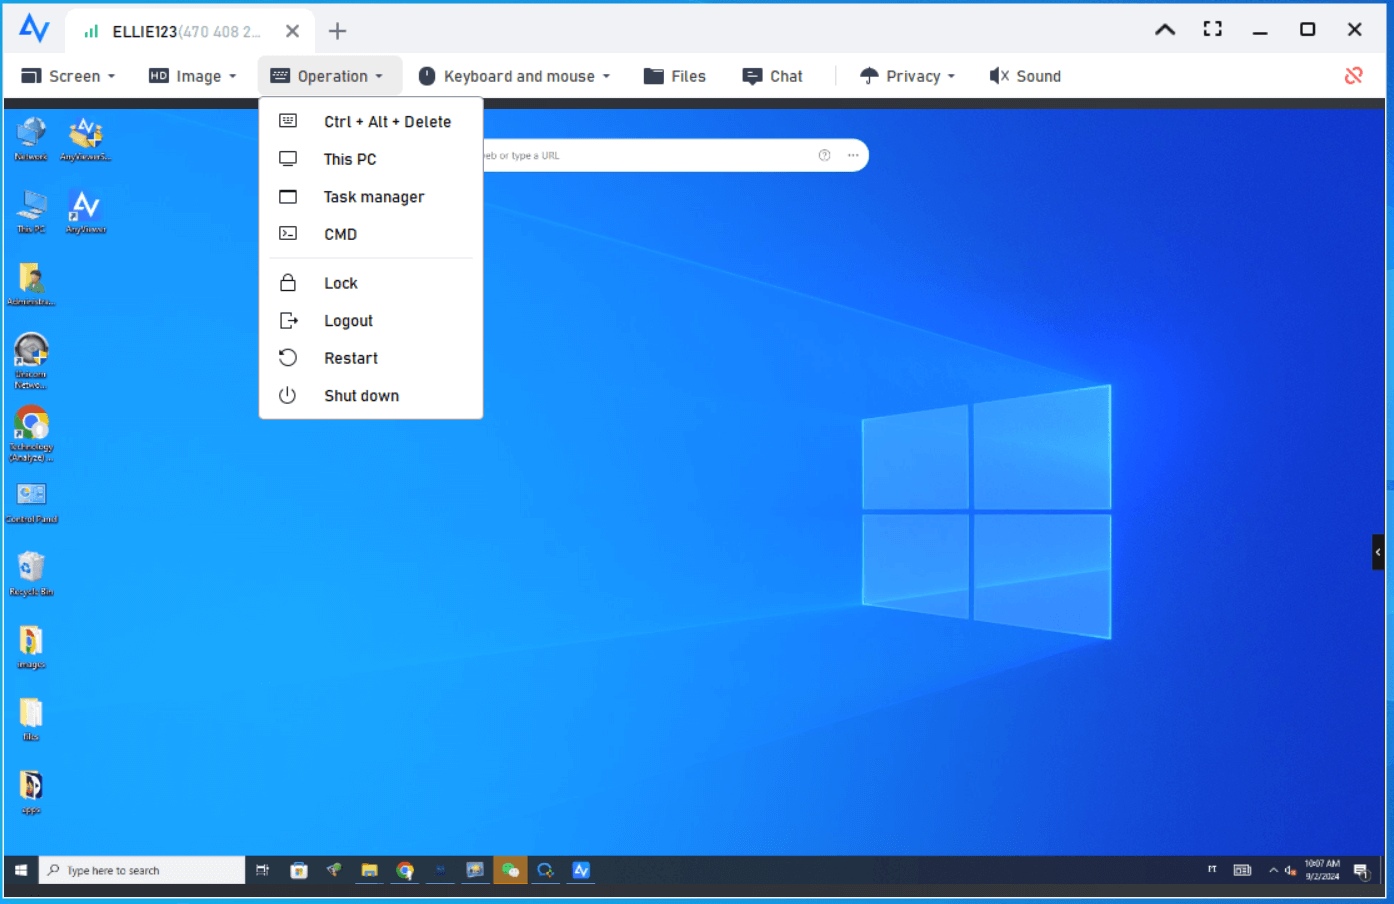
Connecting with VNC Viewer
With the SSH tunnel active, you can now open your VNC Viewer application on your computer. You'll need a VNC Viewer client, such as RealVNC Viewer, which you can download for free from the RealVNC website (RealVNC Viewer Download). It's a very user-friendly application, by the way.
In the VNC Viewer, instead of typing your Raspberry Pi's IP address, you will enter `localhost:5900` (or just `localhost` if the viewer defaults to port 5900). Since the SSH tunnel is redirecting traffic from your local port 5900 to your Pi's VNC server, the VNC Viewer thinks it's connecting to a local server. This is how the magic happens, so to speak.
When prompted, enter the VNC password you set earlier for the VNC server, not your Pi's user password. If everything is set up correctly, you should see your Raspberry Pi's desktop appear! It's quite a satisfying moment when it all connects, you know.
Other Security Measures to Consider
While SSH tunneling is a big step for secure VNC, there are other general security practices you should always follow for your Raspberry Pi. These help create a more complete defense for your little computer. It's always good to have multiple layers of protection, anyway.
Strong Passwords Are a Must
This cannot be stressed enough: use strong, unique passwords for both your Raspberry Pi user account and your VNC server. Avoid easily guessable passwords like "raspberry" or "123456". A strong password should be long, combine uppercase and lowercase letters, numbers, and symbols. Consider using a password manager to help you create and remember these complex passwords. It's pretty much the first line of defense, actually.
You might also want to change the default 'pi' user password on your Raspberry Pi if you haven't already. You can do this by typing `passwd` in the terminal and following the prompts. This is a very simple but important step.
Keep Your System Updated
As mentioned earlier, regularly updating your Raspberry Pi's operating system and installed software is vital. Updates often include security fixes for newly discovered vulnerabilities. Make it a habit to run `sudo apt update` and `sudo apt full-upgrade -y` every week or so. This helps keep your Pi protected against the latest threats. It's a pretty good routine to get into, you know.
Firewall Rules for Added Protection
A firewall acts like a guard for your network, controlling what traffic can come in and go out. For your Raspberry Pi, you can use `ufw` (Uncomplicated Firewall) to set up rules. By default, `ufw` might not be installed, but you can get it. This adds another layer of defense, so to speak.
Install `ufw`:
sudo apt install ufwEnable `ufw`:
sudo ufw enableAllow SSH (very important, or you'll lock yourself out!):
sudo ufw allow sshYou can then deny all other incoming connections by default. Since you're using an SSH tunnel for VNC, you don't need to open the VNC port (5900) directly on your firewall. This is a very secure way to do things, you know. To check the status of your firewall, you can type `sudo ufw status`.
For more insights into network security and how to protect your devices, you can link to this page .
Common Questions About Secure VNC on Raspberry Pi
Is VNC secure for Raspberry Pi?
By itself, VNC might not be fully secure. Many VNC setups send data without encryption, which means someone could potentially see what you're doing or even take control. However, when you use VNC with an SSH tunnel, it becomes very secure. The SSH tunnel encrypts all the VNC traffic, protecting your connection from prying eyes. It's a bit like putting your VNC conversation inside a very strong, locked box, you know.
How do I enable VNC on Raspberry Pi and connect securely?
First, you install the VNC server software on your Raspberry Pi, like RealVNC Server. Then, you make sure SSH is enabled on your Pi. To connect securely, you create an SSH tunnel from your computer to your Pi. This tunnel forwards your VNC connection through an encrypted pathway. Finally, you use a VNC Viewer application on your computer to connect to `localhost` (which is redirected by the tunnel to your Pi), using the VNC password you set. It's a pretty straightforward process once you have the steps, actually.
What are alternatives to VNC for secure RPi remote access?
While VNC with SSH tunneling is a great option for a graphical desktop, there are other ways to access your Raspberry Pi securely. SSH itself is fantastic for command-line access; it's very secure and widely used for server management. Another option for a graphical interface is XRDP, which provides a remote desktop protocol connection, often used with Microsoft Remote Desktop Client. Some people also use tools like TeamViewer or AnyDesk, which handle their own encryption, but these are third-party services. Each has its own benefits, so you can pick what works best for your situation, you know.
Wrapping Things Up
Getting your Raspberry Pi set up for secure remote access with VNC is a very smart move. It gives you the freedom to manage your projects from almost anywhere, all while keeping your data and system safe. By following the steps we've talked about, especially using SSH tunneling, you're building a strong defense around your Pi. Remember to keep your software updated, use very strong passwords, and consider adding firewall rules for even more protection. These practices help ensure your remote connections are not just convenient, but also incredibly secure. You can feel good about connecting to your Pi now, knowing it's well-protected.

Detail Author:
- Name : Prof. Hollis Gibson I
- Username : clement.bernier
- Email : epadberg@yahoo.com
- Birthdate : 2001-10-30
- Address : 136 Lehner Rue DuBuquefurt, TX 75254-2543
- Phone : +1.331.410.2979
- Company : Kreiger-Hahn
- Job : Manager
- Bio : Pariatur culpa quod omnis sequi quia. Culpa quis quis non rerum voluptas. Optio debitis aliquid qui impedit aut.
Socials
facebook:
- url : https://facebook.com/mo'keefe
- username : mo'keefe
- bio : Quia neque consequatur enim quas.
- followers : 4598
- following : 1868
tiktok:
- url : https://tiktok.com/@millero'keefe
- username : millero'keefe
- bio : Culpa explicabo voluptatem delectus non ipsum.
- followers : 4189
- following : 1776
