
Are you curious about making your own skincare products, especially something as popular as hyaluronic acid? It's a natural substance, you know, found right there in your body's fluids, like in your eyes and joints. For skin, it's pretty amazing, often used in serums and supplements. So, if you're thinking about taking charge of what goes on your skin, making your own hyaluronic acid serum at home is, in a way, a very appealing idea.
People are, you see, more and more interested in natural ways to care for their skin, and DIY beauty has become quite a big deal. The thought of creating something effective with simple ingredients, knowing exactly what's in it, is rather comforting. This guide will help you understand how to make your own hyaluronic acid serum, which, you know, can be a really rewarding project.
We will, actually, walk through what hyaluronic acid is, why it's good for your skin, and then, of course, the steps to create your very own batch. It's about empowering you to make choices for your skin that feel right, and, you know, potentially save some money along the way. This is, in some respects, a journey into personalized skincare.
Table of Contents
- What is Hyaluronic Acid, Anyway?
- Why DIY Hyaluronic Acid Serum?
- Gathering Your Tools and Ingredients
- Step-by-Step: Making Your Hyaluronic Acid Serum
- Using and Caring for Your DIY Serum
- Frequently Asked Questions About DIY Hyaluronic Acid
What is Hyaluronic Acid, Anyway?
Hyaluronic acid, also called hyaluronan, is a natural substance, you know, that your body makes. It's an anionic, nonsulfated glycosaminoglycan, which is a bit of a mouthful, but it's distributed widely throughout your system. It's found, for instance, in the fluids around your eyes and joints, where it acts as a cushion and lubricant, which is pretty cool.
Its main job, in fact, is to trap water inside tissue cells. This ability to hold onto a lot of water is why it's so popular in skincare. Different forms of hyaluronic acid exist, and, you know, some are even extracted from rooster combs or made by bacteria in labs for medicinal use, like for joint disorders.
People use products containing hyaluronic acid to help with various things, and it's one of the most popular ingredients in skincare, actually. It's a substance that occurs naturally in the body, and its primary function, as I was saying, is to trap water inside tissue cells. This really helps with hydration, which is, you know, very good for your skin.
Why DIY Hyaluronic Acid Serum?
Making your own hyaluronic acid serum can be a very satisfying experience, to be honest. It gives you complete control over the ingredients, which means you can avoid things you might be sensitive to or just don't want on your skin. Plus, it can be, you know, quite a bit more cost-effective than buying pre-made serums from stores.
Many people, you know, prefer a more natural approach to their beauty routine, and DIY fits right into that. You can choose high-quality components and tailor the concentration to your liking, which is, you know, a real advantage. It's about crafting something that truly suits your skin's unique needs, and that's pretty neat.
The Benefits for Your Skin
Hyaluronic acid offers a lot of good things for your skin, as a matter of fact. Its main benefit is hydration. Because it can hold so much water, it helps to keep your skin feeling plump and looking smooth. This can, you know, really help to reduce the appearance of fine lines and make your complexion seem more radiant.
It's also, you know, quite gentle, making it suitable for most skin types, even sensitive ones. By helping your skin retain moisture, it can also support its natural barrier function, which, you know, helps protect against environmental stressors. This natural substance is, honestly, a powerhouse for skin hydration.
Gathering Your Tools and Ingredients
Before you start mixing, it's important to have everything ready, you know, just like a chef preparing for a meal. This ensures a smooth process and helps keep things clean, which is, actually, very important for homemade skincare. Getting organized first can, quite literally, save you time and frustration.
Essential Items for Your DIY Project
You'll need some basic tools, you know, to get started. First, a small, very clean glass bowl or beaker for mixing. Measuring spoons, preferably stainless steel, are also essential for accurate measurements. You'll also want a small whisk or a mini frother to help blend the ingredients, which, you know, makes a big difference.
For storage, dark glass dropper bottles are ideal, as they protect the serum from light and make application easy. Make sure everything is thoroughly sterilized before you begin. You can do this by boiling glass items or using rubbing alcohol, which is, you know, a simple way to ensure cleanliness.
Picking the Right Hyaluronic Acid Powder
This is, perhaps, the most important ingredient, obviously. You'll want to find cosmetic-grade hyaluronic acid powder. It typically comes in different molecular weights, which, you know, affects how it works on your skin. Lower molecular weight HA can penetrate deeper, while higher molecular weight stays more on the surface, offering a protective layer.
For a good all-around serum, a mix of molecular weights or a medium molecular weight powder is often recommended. Look for reputable suppliers online or at specialty ingredient stores. Quality really matters here, you know, for the effectiveness of your serum.
Water Quality Matters, A Lot
Since water will be the main component of your serum, its quality is, you know, pretty crucial. Distilled water is the best choice because it's free of minerals, contaminants, and bacteria that could, you know, affect your serum's stability or irritate your skin. Tap water, even if filtered, just isn't pure enough for this kind of project, as a matter of fact.
Using distilled water helps ensure that your serum remains stable and effective for as long as possible. It's a small detail, but, you know, it makes a big difference in the end product. You can find distilled water easily at most grocery stores, so it's not, you know, hard to get.
Optional Additions for Extra Goodness
If you want to customize your serum, you can add other beneficial ingredients, you know, very carefully. A small amount of a natural preservative, like Leucidal Liquid SF Max, is often recommended to extend shelf life, especially since this is a water-based product. Essential oils are generally not recommended for facial serums, especially around the eyes, due to potential irritation, but if you do use them, use them very sparingly and choose gentle ones.
Some people like to add a tiny bit of glycerin for extra humectant properties, or perhaps a drop of a gentle, skin-loving oil like jojoba or argan oil, but only if you have dry skin. Remember, less is often more when it comes to DIY skincare, you know, particularly when adding new ingredients.
Step-by-Step: Making Your Hyaluronic Acid Serum
Now for the fun part: putting it all together! This process is, you know, pretty straightforward, but attention to detail will ensure you get a smooth, effective serum. Take your time with each step, as I was saying, for the best results.
Preparing Your Workspace and Equipment
First, make sure your workspace is clean and tidy. Sterilize all your tools and containers. You can do this by boiling them for about 10 minutes, or by rinsing them with rubbing alcohol and letting them air dry completely. This step is, actually, non-negotiable for preventing bacterial growth in your serum, which, you know, is very important.
Having a clean environment helps ensure the longevity and safety of your homemade product. It's like, you know, setting the stage for a successful experiment. So, really, take the time to do this properly.
The Mixing Process: Getting It Just Right
For a standard 1% hyaluronic acid serum (a common and effective concentration), you'll typically use 1 gram of hyaluronic acid powder for every 100 ml of distilled water. Start by measuring out your distilled water into your clean glass beaker or bowl. Then, very slowly, sprinkle the hyaluronic acid powder over the surface of the water.
Do not just dump it all in at once; it will clump. As you sprinkle, gently whisk or stir the mixture. The powder will, you know, initially float and look a bit lumpy. This is normal, so don't worry about it, you know, too much at this stage.
Patience Is a Virtue: Waiting for Dissolution
Once the powder is mostly incorporated, cover your container and let it sit. This is where patience comes in, as a matter of fact. The hyaluronic acid powder needs time to fully hydrate and dissolve into the water, which, you know, can take several hours, sometimes even overnight.
You'll notice the mixture gradually thickening into a gel-like consistency. You can, you know, gently stir it periodically to help the process along, but avoid vigorous shaking, as this can introduce air bubbles. When it's clear and smooth, with no visible clumps, it's ready, which is, you know, quite satisfying.
Storing Your Homemade Serum
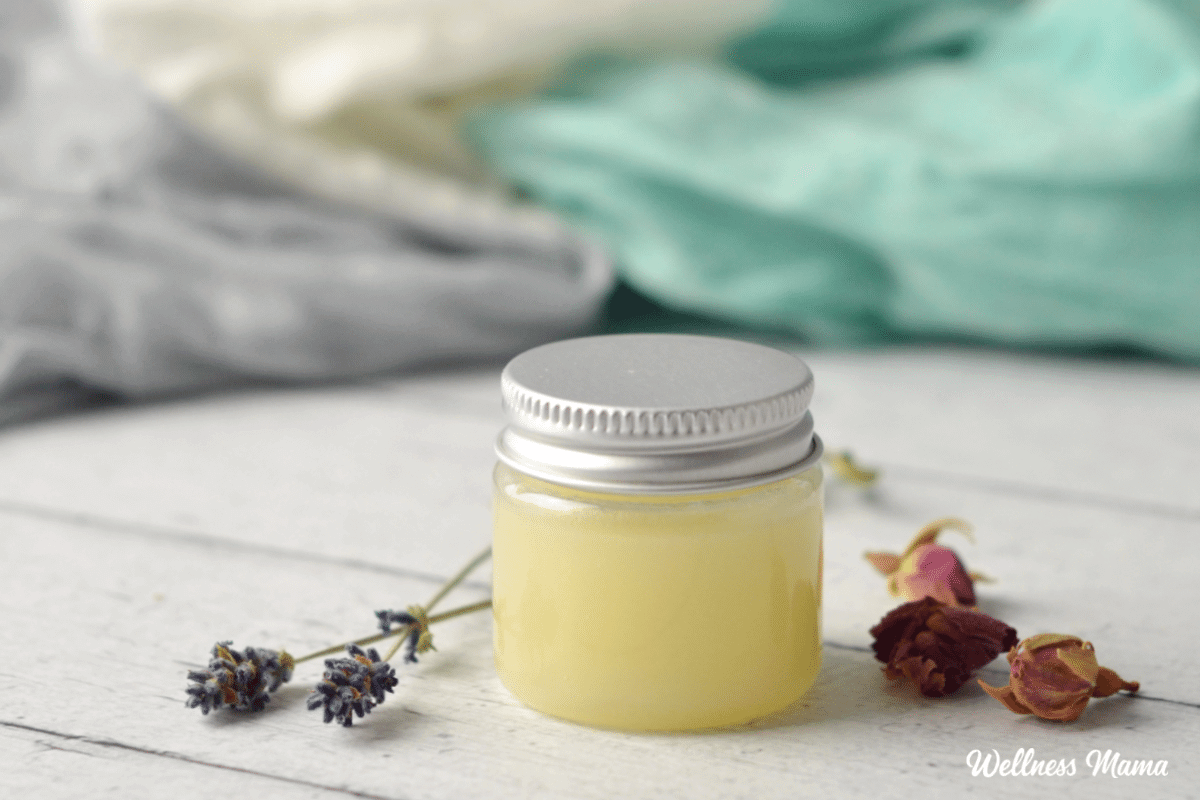
Once your serum is fully dissolved and has a nice, smooth texture, it's time to transfer it to your sterilized dark glass dropper bottles. Use a funnel if you have one to avoid spills, which, you know, can be a bit messy. Fill the bottles, but leave a little space at the top.
Cap them tightly and store them in a cool, dark place. The refrigerator is actually ideal for homemade serums, as it helps preserve freshness and slows down any potential bacterial growth. This step is, you know, very important for keeping your serum good for longer.
Using and Caring for Your DIY Serum
Now that you've made your own hyaluronic acid serum, you're probably eager to try it. But first, there are a couple of things to keep in mind to ensure it's safe and effective for your skin, which, you know, is the whole point.
Patch Testing: Always a Good Idea
Before applying your new serum all over your face, it's, you know, always a good idea to do a patch test. Apply a small amount to an inconspicuous area of your skin, like behind your ear or on your inner forearm. Wait 24 to 48 hours to see if any irritation or reaction occurs, which, you know, is a simple way to be safe.
If you experience redness, itching, or discomfort, then, you know, this serum might not be right for your skin. This step is, actually, pretty crucial, especially when trying new homemade products.
How to Apply Your Serum
Hyaluronic acid works best when applied to damp skin. After cleansing your face, leave it slightly moist, or spritz it with a facial mist or plain distilled water. Then, dispense a few drops of your homemade serum onto your fingertips and gently pat it onto your face and neck. It will absorb quickly, which is, you know, very nice.
Follow up with a moisturizer to seal in the hydration. The moisturizer helps to trap the water that the hyaluronic acid has drawn to your skin, making it, you know, even more effective. This layering approach is, basically, key for maximum benefits.
Shelf Life and Freshness Tips
Homemade skincare products generally have a shorter shelf life than commercial ones because they often lack strong preservatives. Your DIY hyaluronic acid serum, especially if you didn't add a preservative, will typically last about 1-2 weeks when stored in the refrigerator. If you did add a natural preservative, it might last a bit longer, perhaps up to a month or two, which, you know, is pretty good.
Always look for any changes in color, smell, or consistency. If it looks or smells off, it's best to discard it and make a fresh batch. Freshness is, you know, really important for safety and effectiveness, so, you know, keep an eye on it.
Learn more about hyaluronic acid on our site, and link to this page DIY skincare.
Frequently Asked Questions About DIY Hyaluronic Acid
Is it safe to make hyaluronic acid at home?
Making hyaluronic acid serum at home can be safe if you follow proper sanitation procedures and use cosmetic-grade ingredients. The biggest risk is bacterial contamination, which is why, you know, sterilizing everything is so important. Always do a patch test first, as I was saying, to check for any skin reactions.
What ingredients do I need for DIY hyaluronic acid serum?
You basically need two main ingredients: cosmetic-grade hyaluronic acid powder and distilled water. Optional additions can include a natural preservative to extend shelf life, or, you know, perhaps a tiny bit of glycerin for extra hydration. Keep it simple, especially when you're just starting out, which is, you know, a good approach.
How long does homemade hyaluronic acid last?
Without a strong preservative, your homemade hyaluronic acid serum will typically last about 1 to 2 weeks when stored in the refrigerator. With a natural preservative, it might last up to a month or two. Always check for changes in appearance or smell, and, you know, discard it if anything seems off.
For more detailed information on the scientific aspects of hyaluronic acid, you might find this resource helpful: NIH Study on Hyaluronic Acid.


Detail Author:
- Name : Garfield Altenwerth
- Username : estell00
- Email : christiansen.sedrick@yahoo.com
- Birthdate : 2000-04-21
- Address : 889 Collier Circle Suite 453 Gleichnerville, LA 75500-3828
- Phone : +1-229-703-7355
- Company : Stoltenberg-Mertz
- Job : Pediatricians
- Bio : Molestiae ut sed in quo. Rerum ad ut officiis non dolorem ipsa est maiores. Inventore officia doloremque cum id. Veniam aut eveniet molestiae debitis suscipit rerum.
Socials
tiktok:
- url : https://tiktok.com/@boehme
- username : boehme
- bio : Voluptatem et molestiae voluptatem dolore.
- followers : 213
- following : 2975
twitter:
- url : https://twitter.com/ernestina_xx
- username : ernestina_xx
- bio : Quibusdam saepe omnis accusantium aut aut. Et velit porro minima magni ex. Aliquid sapiente voluptas cumque perferendis aliquid deleniti.
- followers : 1030
- following : 2289
facebook:
- url : https://facebook.com/ernestina.boehm
- username : ernestina.boehm
- bio : Aut velit vitae quod. Neque eos sunt perspiciatis ut occaecati.
- followers : 5630
- following : 308
