
Have you ever taken a really great picture, but then you notice those pesky dark areas hiding important details? It happens to pretty much everyone, you know, when the light just isn't quite right. Maybe it's a person's face partly in shade, or a beautiful landscape with a really dark foreground. These shadows, while sometimes adding mood, can often just make your photos look a bit, well, muddy. It's a common challenge for photographers, whether you're just starting out or you've been doing this for a while.
Getting rid of those unwanted dark spots can feel a bit like a puzzle, especially if you're not entirely sure which buttons to press. You want your pictures to show off all the good stuff, not hide it away in gloom. So, many people are looking for good ways to make their images look bright and clear, even when the original shot had some tricky lighting. It's about bringing out the best in what you captured, really.
That's where a tool like Lightroom comes in handy, and honestly, it's quite capable of helping you out. Learning to remove shadows in Lightroom is a skill that can really change your photo editing game. It means you can take a picture that seems almost ruined by bad lighting and make it shine. We're going to look at how you can do just that, step by step, making your photos look so much better, like your pictures deserve, actually.
Table of Contents
- Why Shadows Can Be a Problem
- Understanding Lightroom's Tools for Shadows
- The Basic Panel: Shadows and Blacks
- Using the Tone Curve
- Local Adjustments: Brushes and Gradients
- Step-by-Step: Removing Shadows in Lightroom Classic
- Starting with the Basic Panel
- Refining with the Tone Curve
- Targeting Specific Areas with Local Adjustments
- Dealing with Color Shifts
- Removing Shadows in Lightroom Mobile
- Common Shadow Problems and Quick Fixes
- Beyond the Basics: Other Considerations
- Frequently Asked Questions
- Wrapping Things Up
Why Shadows Can Be a Problem
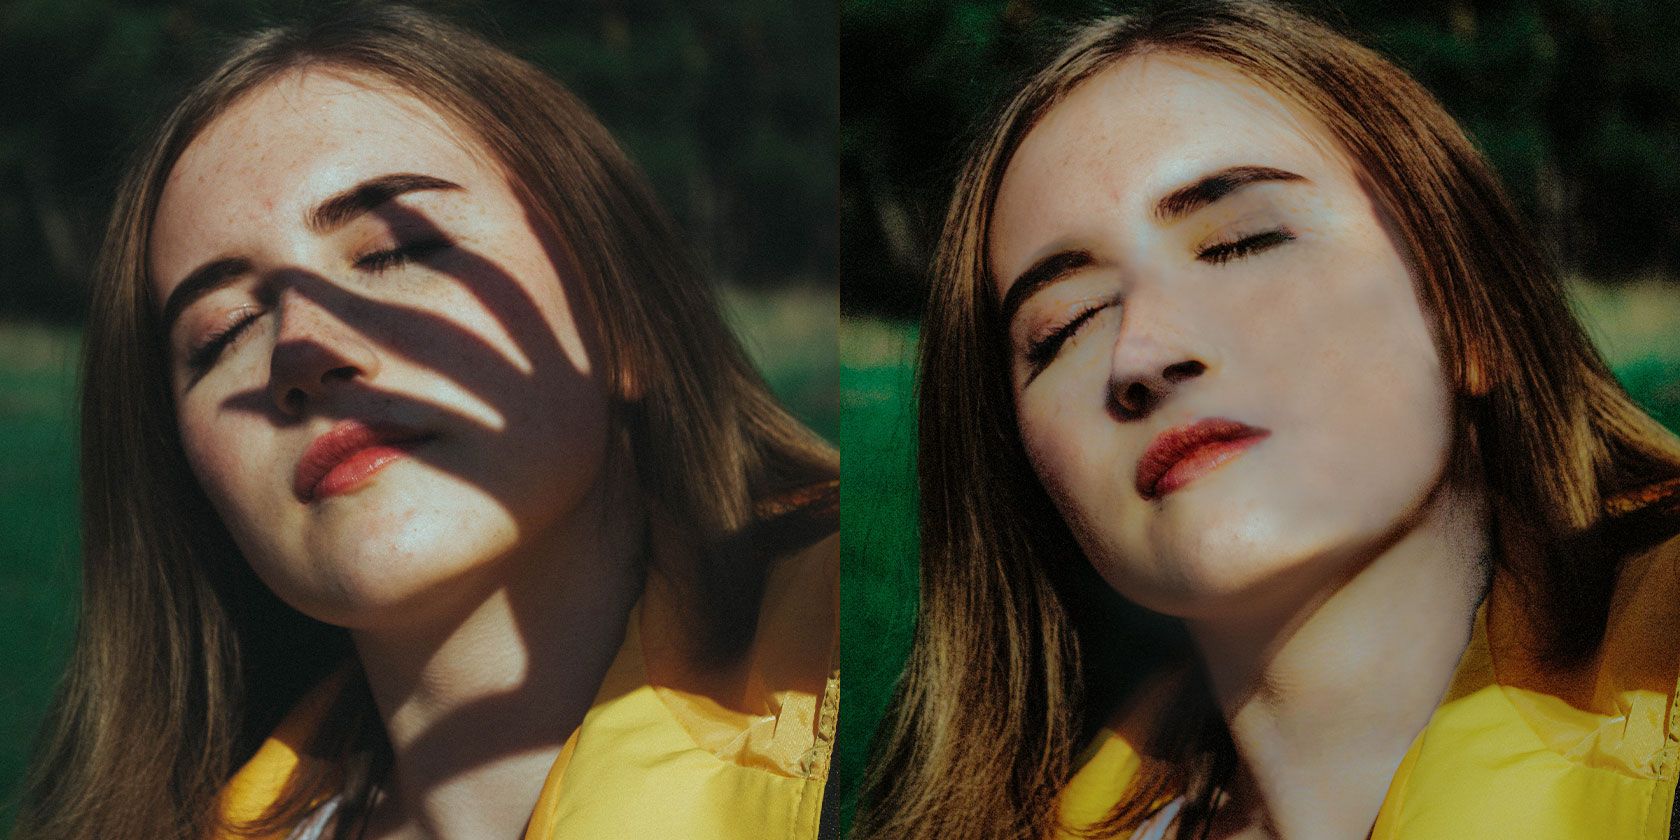
Shadows, in a way, are a natural part of light, and they add depth to pictures. But sometimes, they can just be too much. For instance, if you're taking a portrait outside on a sunny day, you might find half of someone's face is completely dark. Or maybe you're shooting a building, and a big part of it is just lost in deep shade. This makes details hard to see, and it can really distract from the main subject of your picture, you know?
These really dark areas can also make your photos look flat or uneven. You might have a perfectly exposed sky, but then the ground below is almost black. This kind of contrast can be a bit jarring. So, learning to adjust these spots helps create a more balanced and pleasing image overall. It's about making sure your viewer's eye goes where you want it to go, not getting stuck in a dark corner, as a matter of fact.
Plus, if you're sharing your photos online, whether it's for social media or a portfolio, you want them to look their very best. Pictures with harsh, distracting shadows might not get the attention they deserve. So, making those adjustments is a pretty important part of getting your photos ready for the world to see, like your work should be presented, really.
Understanding Lightroom's Tools for Shadows
Lightroom gives you several ways to deal with shadows, and knowing which tool to use when is pretty helpful. It's not just one slider that fixes everything, though that would be nice, wouldn't it? Instead, you have a few options that work together to give you a lot of control. Each tool has its own job, and they all affect your picture in slightly different ways, which is useful.
The Basic Panel: Shadows and Blacks
The Basic panel is usually where most people start, and it has two key sliders for dealing with dark areas: 'Shadows' and 'Blacks'. The 'Shadows' slider, as you might guess, lightens the darker mid-tones in your image. It's great for bringing out details in areas that are somewhat dark but not completely black. So, if you have a face with a bit of shadow on it, moving this slider to the right will gently lift those tones, you know?
The 'Blacks' slider, on the other hand, controls the absolute darkest points in your picture. If you have areas that are pure black with no detail at all, pushing the 'Blacks' slider to the right will start to reveal some information there. Be careful with this one, though, because pushing it too far can make your picture look a bit washed out or grey. It's about finding that sweet spot, more or less.
These two sliders work pretty well together. You might start by increasing the 'Shadows' to get a general lift, and then fine-tune the very darkest parts with the 'Blacks' slider. It's a quick and fairly effective way to make a big difference, honestly.
Using the Tone Curve
The Tone Curve is a bit more advanced, but it gives you incredibly precise control over your image's tones, including shadows. It's a graph where you can adjust specific brightness levels. The bottom left of the curve represents the shadows and blacks, while the top right represents highlights and whites. By pulling up the bottom part of the curve, you can brighten the shadows without affecting the rest of the image as much as the basic sliders might, which is pretty neat.
You can add points to the curve and drag them around to adjust different tonal ranges. For example, you might lift the very darkest point a little, then add another point slightly higher up and lift that too, but maybe not as much. This allows you to really sculpt how the light and dark areas behave. It's a powerful tool, really, and once you get the hang of it, you'll probably use it a lot for fine-tuning, you know.
It's often used after you've made initial adjustments with the basic sliders, to give your shadows a more natural look or to recover even more detail without making the whole picture look flat. So, it's a good next step for refining your work, as a matter of fact.
Local Adjustments: Brushes and Gradients
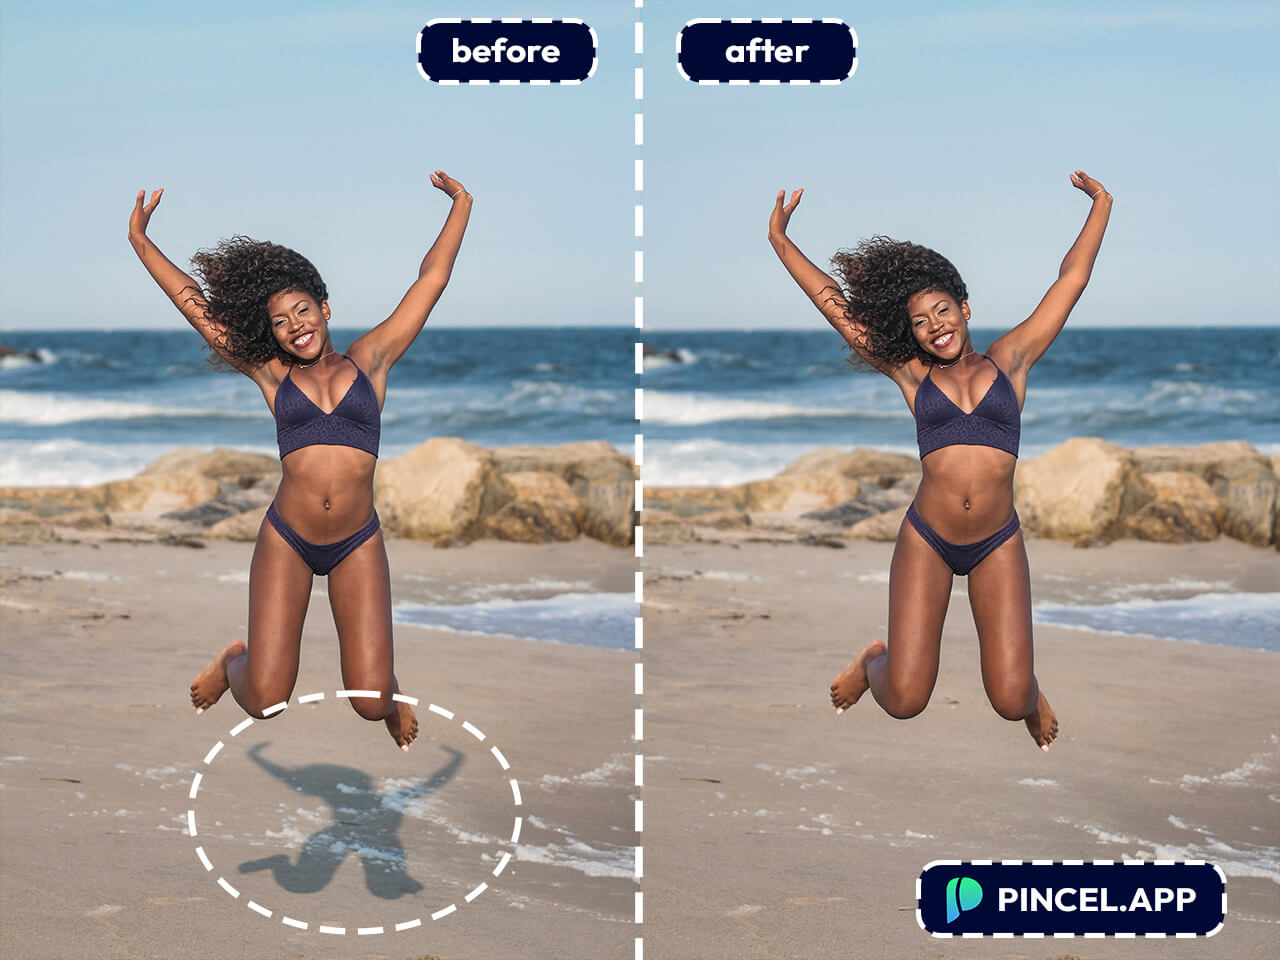
Sometimes, only a specific part of your picture has a shadow problem. That's where local adjustments come in. Lightroom offers adjustment brushes, radial filters, and graduated filters. These tools let you apply changes only to certain areas of your image, which is very useful. For instance, if only a person's hat casts a shadow on their eyes, you wouldn't want to brighten the whole picture, would you?
The Adjustment Brush lets you "paint" adjustments onto specific areas. You can select it, then increase the 'Shadows' or 'Exposure' setting, and brush over the dark spot. The Radial Filter lets you create an oval shape, applying adjustments either inside or outside that shape. This is perfect for brightening a face or a central subject. The Graduated Filter applies a gradual adjustment across a linear area, great for brightening a dark foreground or sky, you know.
These tools are incredibly precise. You can adjust the feathering to make the transition smooth and natural, so no one can tell you even made an adjustment. It's almost like magic, really, how much control you get over just the areas that need it, actually.
Step-by-Step: Removing Shadows in Lightroom Classic
Alright, let's walk through the process of getting rid of those shadows in Lightroom Classic. It's a pretty straightforward process once you know the steps. You'll want to have your image open in the Develop module, that's where all the magic happens, so.
Starting with the Basic Panel
First things first, head over to the Basic panel on the right side of your screen. You'll see a bunch of sliders there. Look for the 'Shadows' slider. Take that slider and gently move it to the right. As you do, you should see the darker areas in your picture start to brighten up. Don't go too crazy with it, though, as pushing it too far can make your image look a bit artificial or noisy, you know?
After that, find the 'Blacks' slider, which is usually right below 'Shadows'. Move this one to the right as well, but with even more care. This will bring out detail in the very darkest parts of your image. If you push it too much, those true blacks might turn into a dull grey, which you probably don't want. It's about finding a balance that looks natural, really.
You might also want to adjust the 'Exposure' slider a tiny bit if the whole image feels a little too dark, but usually, 'Shadows' and 'Blacks' are your primary tools here. This initial step often fixes a good chunk of the problem, you know.
Refining with the Tone Curve
Once you've made your initial adjustments in the Basic panel, open up the Tone Curve panel. It's usually found just below the Basic panel. You'll see a diagonal line on a graph. The bottom left represents the darkest tones, and the top right is for the brightest. To lighten shadows, you'll want to lift the lower part of this curve.
Click on the curve in the lower-left section and drag it upwards slightly. You'll see the shadows get brighter. You can add another point a bit further up the curve, maybe around the quarter-tone mark, and lift that a little too. This helps create a smoother transition and prevents your shadows from looking flat. It's a subtle adjustment, but it makes a big difference in how natural the light looks, honestly.
You can experiment with adding multiple points and moving them around. The goal is to lift the shadows without making the mid-tones too bright or losing contrast in the rest of the image. It's a very powerful way to fine-tune your light, like a painter adding subtle touches, in a way.
Targeting Specific Areas with Local Adjustments
If some shadows are still stubbornly dark, or if you only want to lighten a very specific spot, use the local adjustment tools. Click on the Adjustment Brush icon (it looks like a paintbrush) or the Radial Filter (a circle with a dot in the middle), or the Graduated Filter (a rectangle fading out). They are usually at the top of the Develop module, under the histogram.
With the Adjustment Brush, select it, then increase the 'Shadows' or 'Exposure' slider in its settings. Then, simply paint over the areas you want to lighten. You can adjust the brush size and feathering to make your edits precise and blend in smoothly. For instance, if a person's eyes are in shadow, you can just brush over their eyes, you know?
For a Radial Filter, click and drag to create an oval over the area you want to adjust. You can then choose to apply the effect inside or outside the oval. This is great for brightening a face or an object that's somewhat circular. The Graduated Filter works well for dark foregrounds or skies. Just drag it from the edge of your image into the area you want to affect. These tools give you incredibly precise control, so you can really target just what needs fixing, as a matter of fact.
Dealing with Color Shifts
Sometimes, when you lighten very dark shadows, you might notice a color cast appears. This happens because the original shadow might have had a slight color tint that becomes more obvious when brightened. For example, shadows often have a cool, blueish tint. When you brighten them, that blue can become too strong, you know?
To fix this, you can use the 'White Balance' sliders in the Basic panel, or even better, use the 'Color' slider within the local adjustment brush or filter you used. If the shadows look too blue, you might increase the 'Temperature' a little or decrease the 'Tint' slightly. If they look too green, adjust the 'Tint' towards magenta. It's about neutralizing that unwanted color, basically.
Another option is to use the 'HSL/Color' panel. You can select the specific color that's showing up too much in the shadows and reduce its 'Saturation' or adjust its 'Hue'. This gives you very fine control over individual colors. So, it's a good idea to keep an eye on colors when you're brightening shadows, just to make sure everything looks natural, really.
Removing Shadows in Lightroom Mobile
Good news! You can also remove shadows using the Lightroom Mobile app, which is super convenient for on-the-go editing. The tools are pretty similar to the desktop version, just laid out a bit differently. It's very accessible, you know, for quick edits.
First, open your photo in the Lightroom Mobile app. Then, look for the 'Light' panel. This is where you'll find the main exposure controls. Inside the 'Light' panel, you'll see the 'Shadows' and 'Blacks' sliders, just like on the desktop. Move these to the right to lighten those dark areas. It's pretty intuitive, actually.
For more specific adjustments, look for the 'Selective' adjustments icon (it looks like a circle with a dashed line). Here, you can use brushes or radial and linear gradients to target specific parts of your image. You can add a point, then choose 'Light' and adjust the 'Shadows' or 'Exposure' for just that area. It's a powerful way to refine your mobile edits, like your desktop edits, you know.
The mobile app also has a 'Color' panel where you can fine-tune color casts if they appear after brightening shadows. It's a pretty complete tool for editing on your phone or tablet, so you can make your pictures look great even when you're away from your computer, which is really handy, I mean.
Common Shadow Problems and Quick Fixes
You'll probably run into a few common shadow issues. Knowing some quick fixes can save you a lot of time. One common problem is very harsh, distinct shadows, like a sharp line across someone's face. These are tough because they often have very little detail to recover, you know?
For harsh shadows, start with the 'Shadows' and 'Blacks' sliders, but don't expect miracles if the area was truly underexposed. Then, use an Adjustment Brush with a high 'Feather' setting and apply a gentle increase in 'Exposure' and 'Shadows' to the specific area. This helps blend the shadow edge more naturally. Sometimes, a tiny bit of 'Clarity' reduction in that area can also soften the edge, which is a neat trick, actually.
Another issue is when brightening shadows introduces a lot of noise or grain. This happens a lot in poorly lit areas because the camera had to work harder to capture light, which often creates digital noise. To fix this, after brightening, go to the 'Detail' panel and increase the 'Noise Reduction' (specifically 'Luminance Noise Reduction'). Be careful not to overdo it, as too much noise reduction can make your image look plastic or blurry, so.
Finally, sometimes shadows just look flat after brightening. To add some punch back, try increasing the 'Contrast' or 'Dehaze' sliders slightly in the Basic panel, or use the Tone Curve to add a subtle S-curve (lifting highlights, darkening shadows slightly) after you've brightened the overall shadow area. This brings back some visual pop, you know, to your image.
Beyond the Basics: Other Considerations
While removing shadows is often about brightening, sometimes it's also about managing light in general. Think about the direction of light when you're shooting. If you can, try to position your subject so that light falls evenly on them, or use reflectors to bounce light into shadowy areas. It's almost always easier to fix things in camera than in post-processing, you know.
Also, consider the overall mood you want for your picture. Not all shadows are bad. Some can add drama or a sense of mystery. So, before you rush to remove every single shadow, think about whether it actually contributes to the picture's story. It's a creative choice, really, not just a technical one, as a matter of fact.
Keeping your camera's dynamic range in mind is also helpful. Some cameras are better at capturing detail in both very bright and very dark areas. If your camera struggles, you might consider shooting in RAW format. RAW files contain much more information than JPEGs, giving you a lot more flexibility to recover details in shadows without introducing as much noise or artifacts. Learn more about image editing techniques on our site, and for deeper insights, link to this page https://www.adobe.com/products/photoshop-lightroom.html.
Frequently Asked Questions
How do I remove shadows from a face in Lightroom?
To remove shadows from a face, start in the Basic panel by increasing the 'Shadows' slider, and maybe a little of the 'Blacks' slider. For more precise control, use the Adjustment Brush. Select the brush, increase 'Exposure' and 'Shadows' in its settings, then carefully paint over the shadowy parts of the face. You can also adjust 'Clarity' slightly to soften harsh edges, you know.
What is the best way to lighten shadows?
The best way often involves a combination of tools. Start with the 'Shadows' and 'Blacks' sliders in the Basic panel for a general lift. Then, use the Tone Curve to refine those darker tones, giving them a more natural look. If specific areas need attention, use local adjustment tools like the Adjustment Brush or Radial Filter. It's about layering your edits, honestly.
Can Lightroom remove shadows automatically?
Lightroom doesn't have a specific "remove shadows automatically" button, but it does have an "Auto" button in the Basic panel. This button tries to analyze your image and apply what it thinks are the best overall adjustments, including to shadows. While it can be a good starting point, it often needs manual fine-tuning afterward to get the exact look you want, you know, for your picture.
Wrapping Things Up
So, getting rid of those unwanted shadows in your pictures doesn't have to be a big headache. With Lightroom, you have some really good tools at your fingertips, whether you're using the desktop version or the mobile app. By understanding how the 'Shadows' and 'Blacks' sliders work, playing with the Tone Curve, and using those precise local adjustments, you can really bring your photos to life. It's all about practice, you know, and just trying things out. Keep experimenting with these adjustments, and you'll be making your pictures clearer and brighter in no time, like a pro, really.
Detail Author:
- Name : Zackary Barrows
- Username : xweissnat
- Email : gunnar00@hotmail.com
- Birthdate : 1975-04-14
- Address : 7045 Brandi Dale South Collinland, TN 73632
- Phone : 949-738-7404
- Company : Wiegand-Bode
- Job : Brokerage Clerk
- Bio : Dolorem rerum consequatur expedita adipisci dolorem. Ut sit sed aliquam tempore nemo voluptatem omnis. Tempora in omnis quo quis quasi iure dolorum nemo.
Socials
linkedin:
- url : https://linkedin.com/in/zita3484
- username : zita3484
- bio : Ut rerum eum doloremque est et labore.
- followers : 3421
- following : 144
instagram:
- url : https://instagram.com/zita_official
- username : zita_official
- bio : Qui laboriosam qui facere et. Iste dolor dolor expedita quidem.
- followers : 5346
- following : 485
twitter:
- url : https://twitter.com/osinski2006
- username : osinski2006
- bio : Voluptate at dolorem rerum sunt. Modi eos consectetur assumenda quam possimus vero debitis. Doloremque modi tempora eum fugiat.
- followers : 366
- following : 2080
