
Dreaming of eyebrows that truly stand out, giving your face a polished look without daily fuss? Many people are, and that's why learning how to use Refectocil eyebrow tint at home has become such a popular topic. Getting salon-quality results from your own bathroom is actually quite possible, and it can save you both time and money in the long run. This guide will walk you through each step, making sure you feel confident and ready to give your brows a beautiful, lasting color boost.
For a long time, achieving perfectly defined brows meant regular trips to a professional, which, as you know, can add up. But with products like Refectocil, you can bring that experience right into your personal space. It's about putting the tools and color into action for a specific purpose: enhancing your natural brow shape and shade. This method offers a wonderful way to keep your brows looking their best, pretty much all the time, with just a little effort.
The appeal of at-home beauty solutions, especially for things like brow tinting, has grown quite a bit, arguably more so in recent years. People are looking for convenient and effective ways to manage their beauty routines on their own terms. So, if you're keen on finding out how to use Refectocil eyebrow tint to get those lovely, full-looking brows you've always wanted, you've certainly come to the right place. We'll go over everything you need to know, giving you a clear path to follow.
Table of Contents
- Why Tint Your Brows at Home?
- What You'll Need: Your Refectocil Kit
- Getting Ready for Tinting
- Mixing Your Refectocil Tint
- Applying the Tint with Care
- Waiting for the Magic to Happen
- Removing the Tint Properly
- Aftercare and Keeping Your Tint Fresh
- Common Questions About Refectocil Tinting
- Troubleshooting Tips
Why Tint Your Brows at Home?
Many people find that tinting their eyebrows at home offers a lot of good points. For one, it's a very practical choice for saving money. Salon visits for brow services can add up quickly over a year, so doing it yourself means those funds stay in your pocket. It's a smart way to manage your beauty budget, you know, and still look good.
Beyond the cost, there's the sheer convenience of it all. You can tint your brows whenever it fits into your schedule, whether that's early in the morning before the day gets busy or late at night after everything else is done. No appointments to make, no travel time, just pure flexibility. It’s pretty much about putting your time to good use, for your own benefit.
Also, having tinted brows can really simplify your daily makeup routine. You might find you don't need to fill in your brows as much, or perhaps not at all, which saves precious minutes each morning. This means less effort and more time for other things, like an extra cup of coffee. It truly helps to streamline things, giving you a bit of extra breathing room.
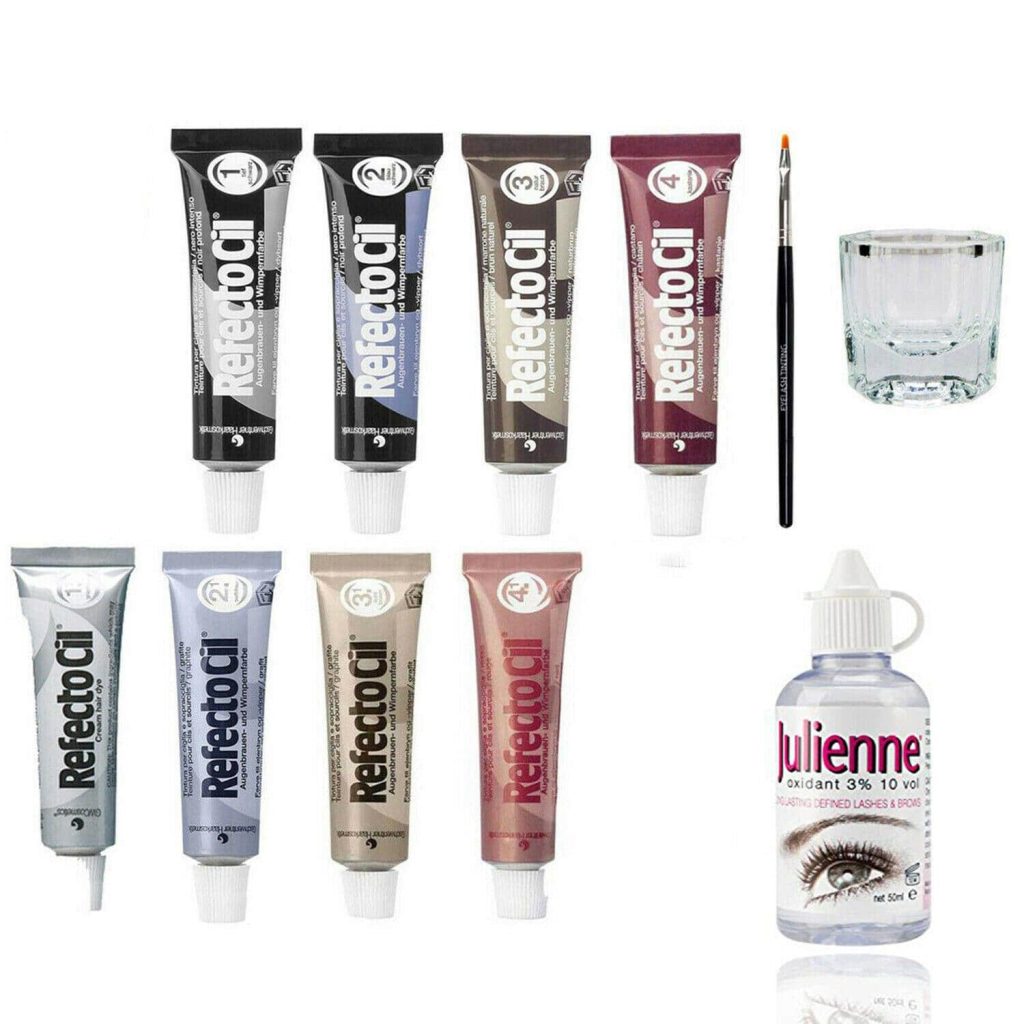
What You'll Need: Your Refectocil Kit
Before you get started on how to use Refectocil eyebrow tint, you need to gather your supplies. You'll want to have everything ready and within reach so the process goes smoothly. Think of it like getting your tools together before you start a project; it just makes things easier. This preparation is key to putting the tinting process into action effectively.
Here’s a basic list of what you'll typically need to have on hand for a successful brow tinting session: your chosen Refectocil tint color, the Refectocil Oxidant developer (either liquid or cream, depending on your preference), a small non-metallic mixing dish, and an application stick or brush. You'll also want cotton pads or balls, some petroleum jelly or a barrier cream, and a timer. Having these items ready means you can just flow through the steps, which is very helpful.
Sometimes, people also like to have a spoolie brush for combing their brows before and after, and perhaps some makeup remover for any tiny mistakes. It’s about having the right things to employ for the best outcome. Remember, getting organized beforehand really does make a difference in how well the tinting goes, so take a moment to set up your space.
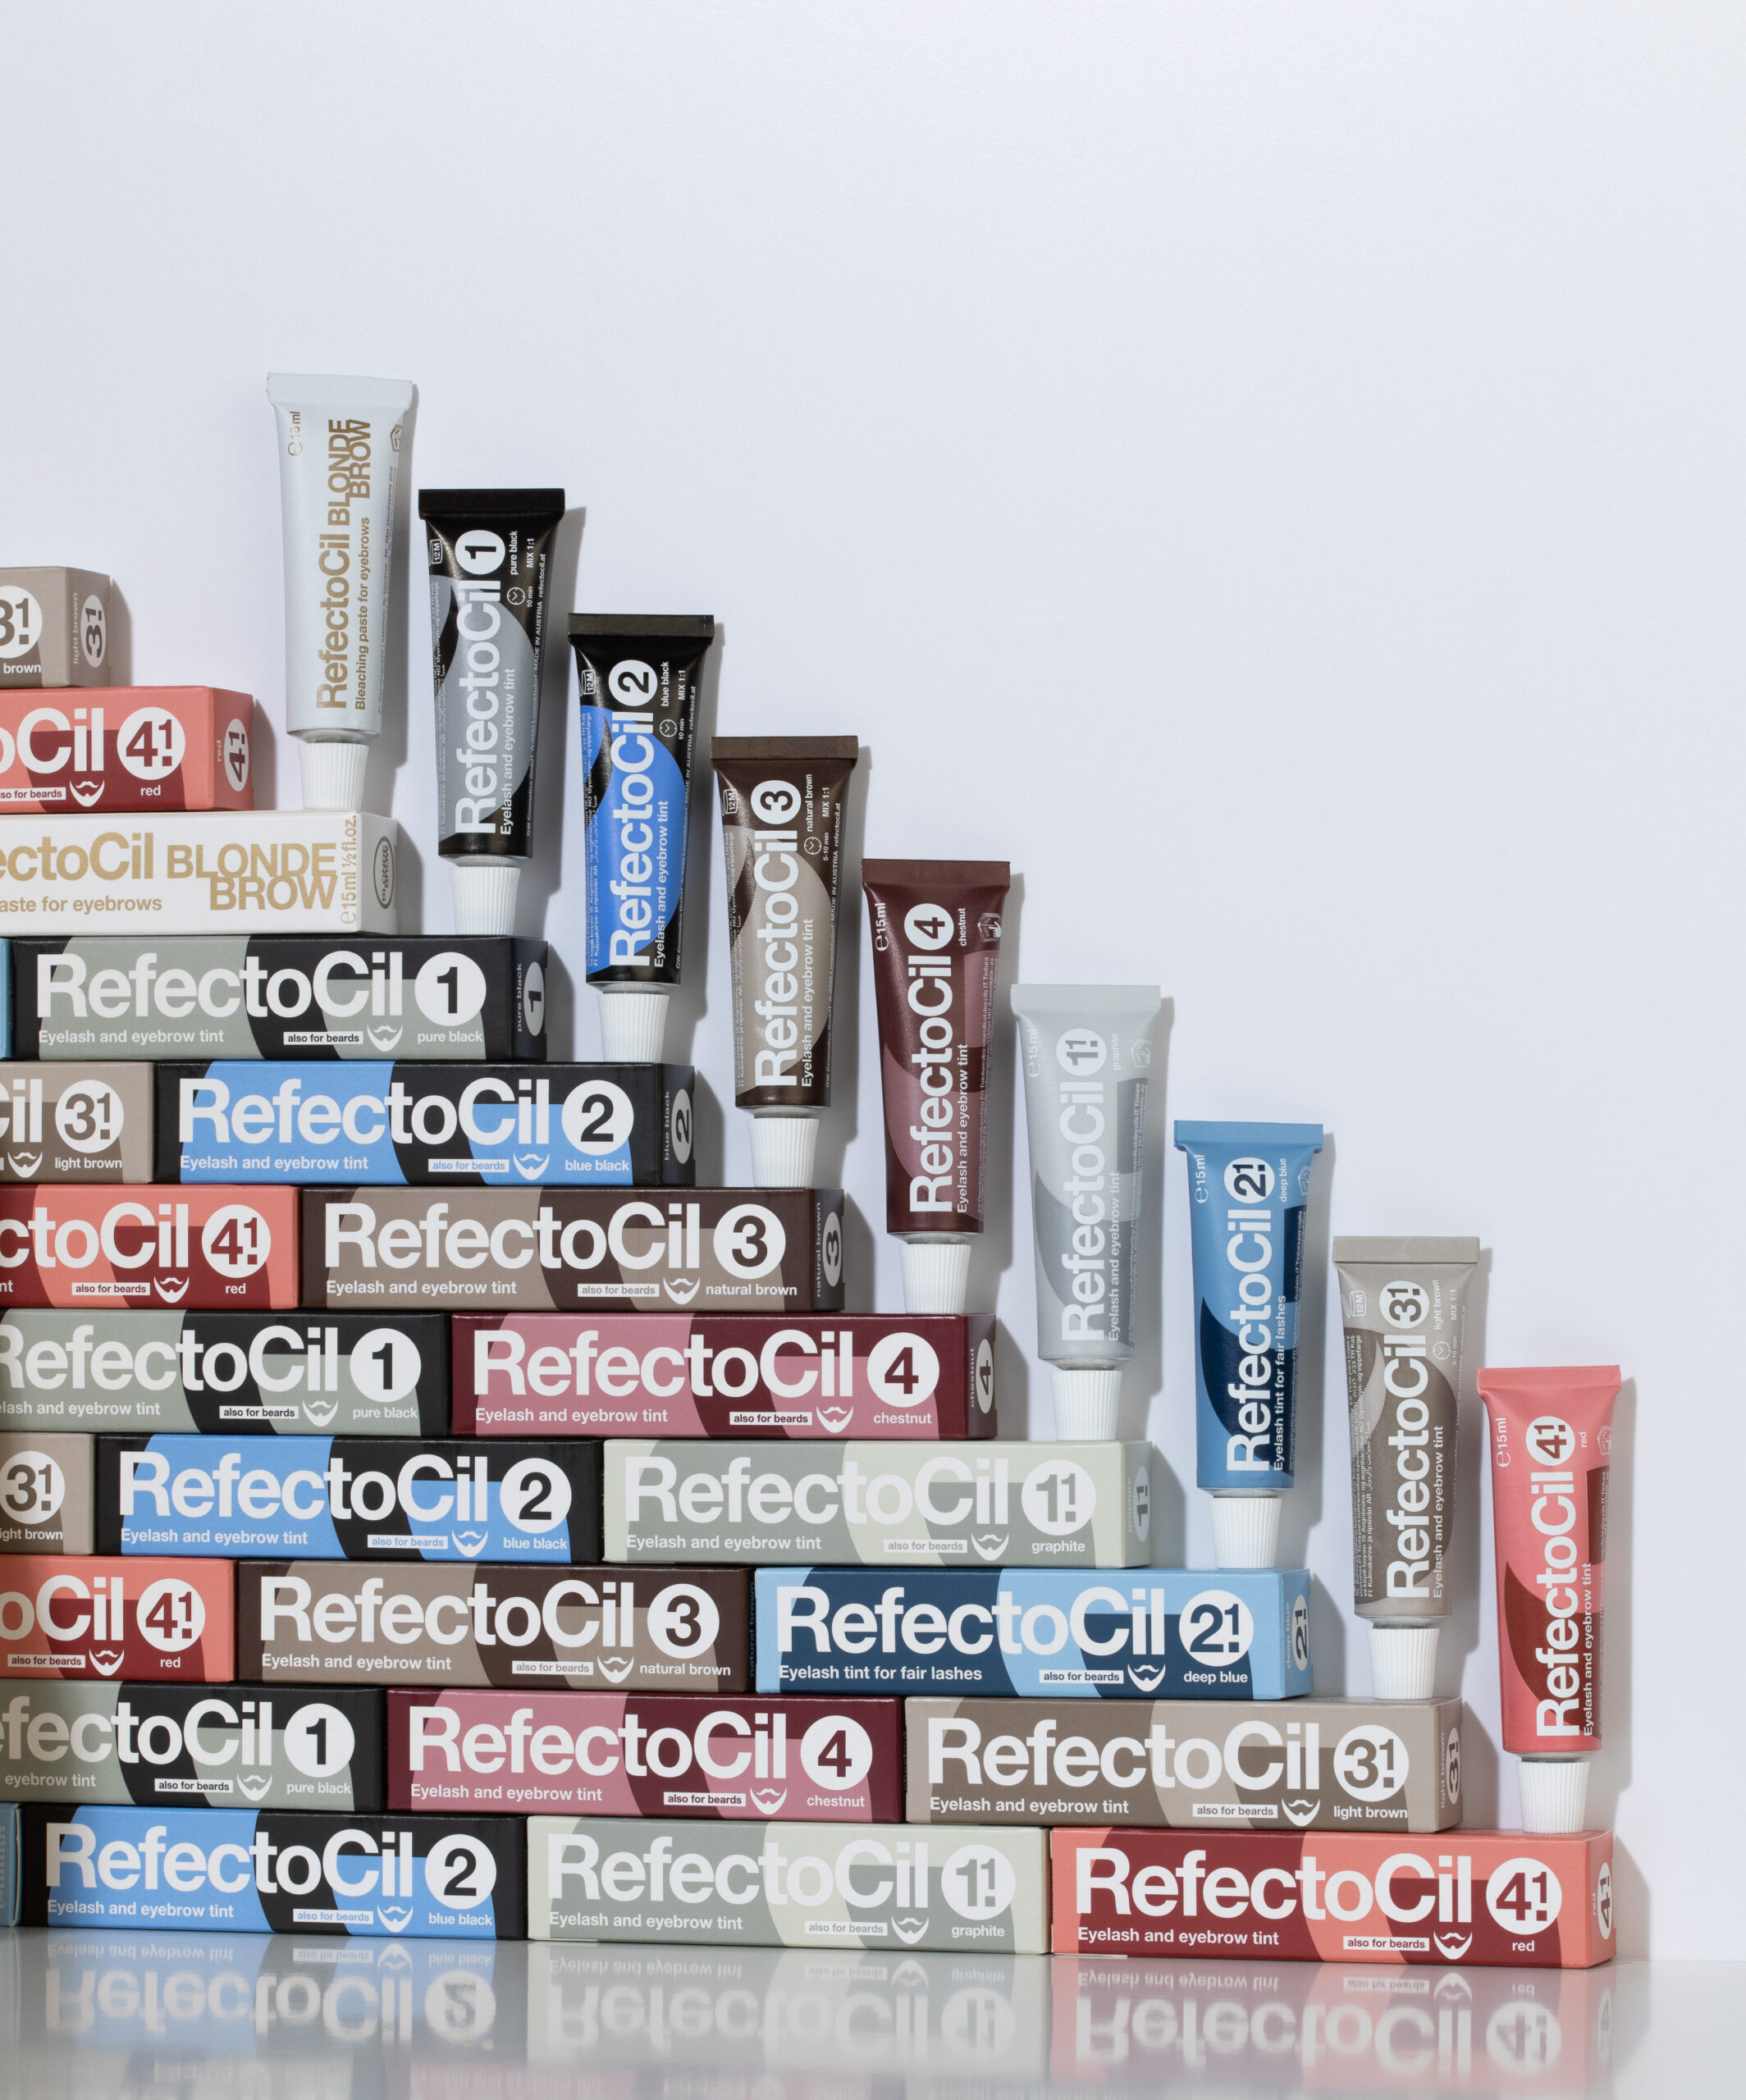
Choosing Your Tint Shade
Picking the right Refectocil tint shade is a rather important step for getting natural-looking brows. You don't want them to look too dark or too light, obviously. A good rule of thumb is to pick a shade that is one or two shades darker than your natural hair color, especially if your hair is light. For darker hair, matching your natural brow color or going just a tiny bit darker can work well. It’s about finding a shade that complements your features, in a way.
Refectocil offers a good range of colors, from light brown to black, and even some specialty shades like graphite or red. If you’re just starting out, you might consider mixing a small amount of two shades to get a custom color that perfectly suits you. For instance, a touch of light brown with a darker shade can soften the overall look. This helps you to truly put the color to its best purpose for your specific needs.
When you're looking at the color options, think about your skin tone and hair color. Someone with very fair skin and blonde hair might find pure black too harsh, for example. A light brown or natural brown would likely be a much better fit. It’s about making a choice that will enhance, not overwhelm, your face. Take your time with this part; it's quite a key decision for the final result.
Getting Ready for Tinting
Preparation is honestly half the battle when it comes to how to use Refectocil eyebrow tint successfully. It’s about setting the stage so that the tint can work its magic without any unexpected issues. Skipping these initial steps can lead to uneven color or even skin irritation, which nobody wants. So, take these parts seriously; they are truly vital for a good outcome.
Patch Test First, Always!
This step is absolutely non-negotiable, seriously. Before you apply any tint to your eyebrows, you must do a patch test. This helps you check for any allergic reactions to the product. A tiny amount of the mixed tint applied to a discreet area, like behind your ear or on your inner elbow, will show you if your skin reacts poorly. It's a simple, yet very important, safety measure.
Apply a small dab of the mixed tint to the test area and leave it on for the same amount of time you plan to leave it on your brows. Then, wipe it off. Wait 24 to 48 hours. If you see any redness, itching, swelling, or irritation, do not use the product on your eyebrows. This test is basically putting the product into service on a small scale to see its effects before a full application. Your skin's health is, you know, really important.
Even if you've used tint before, it's a good idea to do a patch test every so often, as sensitivities can change over time. It’s a quick step that saves a lot of potential trouble. Seriously, don't skip this. It's a simple act of prevention that truly protects you.
Cleaning and Prepping Your Brows
Clean brows are happy brows, especially when it comes to tinting. Any oils, makeup, or dirt on your eyebrows can create a barrier, stopping the tint from sticking evenly to the hairs. This means you could end up with patchy color, which is not what anyone wants. So, a thorough cleaning is pretty much a must-do.
Use an oil-free makeup remover or a gentle cleanser to wipe down your brows and the skin around them. Make sure there’s no residue left. After cleaning, ensure your brows are completely dry. You can gently pat them with a clean towel. Dry brows allow the tint to adhere properly, making sure you employ the product for its best purpose: even color.
Some people like to lightly brush their brows into their desired shape before tinting. This can help you see where the tint needs to go and ensure the hairs are all lying in the right direction. It’s a small step that can make a big difference in the final look, giving you a bit more control over the outcome.
Protecting Your Skin
To avoid tinting the skin around your eyebrows, which can look a bit messy, you need to create a protective barrier. Petroleum jelly or a thick barrier cream works perfectly for this. Apply a generous, but not too thick, layer around the brow area, being careful not to get any on the brow hairs themselves. Any jelly on the hairs will prevent the tint from coloring them.
You can also use small, thin cotton pads or strips placed under your lower brow line, secured with a bit more petroleum jelly. This provides an extra layer of defense against accidental tint marks. This is a very simple way to use a common product for a protective purpose. It helps keep the tint where it belongs, on your brow hairs.
Be very precise with your application of the barrier cream. Pay close attention to the edges of your brow shape. This little bit of effort here saves you from having to scrub your skin later to remove unwanted color. It’s a smart way to manage the process, really, and ensures a cleaner finish.
Mixing Your Refectocil Tint
Now, this is where you actually put the product into service, getting it ready for its primary purpose: coloring your brows. Refectocil tint needs to be mixed with its specific developer, either liquid or cream, to activate the color. You should always follow the instructions that come with your Refectocil kit for the exact ratio, as it can vary slightly depending on the product type.
Typically, you’ll use about 2 cm (about 0.8 inches) of the tint color paste from the tube and mix it with 10 drops of the liquid Oxidant or 15-20 drops of the cream Oxidant. Use your non-metallic mixing dish and the application stick to thoroughly combine the two. You want a smooth, creamy consistency, like a paste, with no lumps. This ensures the color develops evenly, you know.
Mix it right before you're ready to apply it. The mixture starts working as soon as the tint and developer meet, so you want to use it fresh. Don't mix it too far in advance, as its potency can lessen over time. This step is pretty much about creating the active agent that will transform your brows, so getting the mix right is key.
Applying the Tint with Care
With your mixture ready, it’s time to apply the tint to your brows. This step requires a steady hand and a bit of precision. Using your application stick or brush, carefully apply the tint to your eyebrow hairs. Start from the inner corner of your brow and work your way outwards, making sure to coat every single hair. It’s about employing the tint for its intended purpose on each individual strand.
Apply the tint in the direction of hair growth first, then go back and apply it against the hair growth to ensure all sides of the hairs are covered. You want a generous, even layer of tint on both brows. Make sure the shape you're creating with the tint matches the brow shape you want. This is where your careful preparation with the barrier cream really helps.
Take your time, especially if this is your first time. If you get any tint on your skin outside the protected area, quickly wipe it off with a damp cotton swab or a bit of makeup remover. The quicker you clean up mistakes, the less likely they are to stain your skin. Remember, practice makes things a bit easier, so don't worry if it's not perfect right away.
Waiting for the Magic to Happen
Once the tint is applied, the waiting game begins. This is when the tint does its work, changing the color of your brow hairs. The amount of time you leave the tint on depends on how dark you want your brows to be. For a lighter tint, you might leave it on for only 5-10 minutes. For a deeper, more noticeable color, you could go up to 15-20 minutes. It's truly about personal preference and how your hair takes color.
Set a timer, seriously. It’s easy to lose track of time, and leaving the tint on for too long can result in brows that are much darker than you intended. You can always apply more tint later if it's not dark enough, but you can't easily lighten them once they're too dark. This is where patience really pays off, you know, for the desired outcome.
If you're unsure, it's always better to start with a shorter processing time. You can always reapply for a few more minutes if you want more intensity. This way, you're using the tint in a controlled manner, getting to know how it works for your specific brow hairs. It's about using the product wisely to get the look you want, without going overboard.
Removing the Tint Properly
When your timer goes off, it's time to remove the tint. This step needs to be done carefully to avoid getting tint in your eyes and to ensure a clean finish. Have plenty of damp cotton pads or balls ready. Start by gently wiping away the tint from one brow. Use fresh cotton pads for each wipe to avoid spreading the tint around.
Wipe downwards, away from your eyes, until all the visible tint is gone. Then, rinse your brows thoroughly with cool water. You can splash water directly onto your brows or use a damp cloth. Make sure there’s no tint residue left on your skin or hairs. This thorough cleaning is important for putting the final touches on your newly tinted brows.
Repeat the process for the other brow. Check in a mirror to see if you missed any spots or if there's any tint on your skin. If you find any stray marks, a little bit of soap and water or a gentle makeup remover can help lift them. It’s about ensuring a clean and polished look, which is pretty much the goal.
Aftercare and Keeping Your Tint Fresh
Once your brows are tinted, a little aftercare can help keep them looking great for longer. Avoid getting your brows wet or applying any oil-based products to them for the first 12-24 hours. This allows the color to fully set and helps it last. Think of it as letting the tint truly settle into its purpose on your brows.
Refectocil tint usually lasts for about 4-6 weeks, depending on your hair growth cycle and how often you wash your face. To help the color stay vibrant, try to avoid harsh cleansers or exfoliating products directly on your brows. Also, excessive sun exposure can cause the tint to fade a bit faster, so consider wearing a hat if you're out in the sun for long periods.
You can use a brow conditioner or a clear brow gel to keep your brows looking neat and nourished between tinting sessions. Some people find that a gentle brow serum helps keep the hairs healthy, which can also contribute to how well the tint holds. It’s about supporting the tint’s purpose over time, so you can enjoy your beautiful brows for as long as possible.
Common Questions About Refectocil Tinting
How long do you leave Refectocil tint on eyebrows?
The time you leave Refectocil tint on your eyebrows really depends on the color intensity you want. For a subtle change, you might only need 5 to 10 minutes. If you’re aiming for a deeper, more noticeable color, you could leave it on for up to 15 or even 20 minutes. It's always a good idea to start with a shorter time, especially if you're new to tinting, and then add more time if you want a darker result. This way, you are putting the tint to its purpose in a controlled way, you know, to avoid over-darkening.
Do you mix Refectocil tint with water or developer?
Refectocil tint must be mixed with its specific Refectocil Oxidant developer, not water. The developer is what activates the tint color, allowing it to work on your brow hairs. Using water instead of the developer will not give you the desired coloring effect. You'll typically mix a small amount of the tint paste with a specific number of drops of the liquid or cream developer, following the instructions that come with your product. This mixing is where you truly put the components into service, getting them ready for their purpose.
Can I tint my eyebrows myself?
Yes, absolutely, you can tint your eyebrows yourself at home! Many people do this successfully. The key is to follow the instructions carefully, especially when it comes to doing a patch test first to check for any reactions. Being precise with your application and timing is also important for getting good results. With a little practice, you’ll find that tinting your own eyebrows is a straightforward and rewarding process, allowing you to employ this skill for your own benefit. Learn more about eyebrow care on our site, and for more tips on at-home beauty treatments, link to this page.
Troubleshooting Tips
Even with careful steps, sometimes things don't go exactly as planned when you're learning how to use Refectocil eyebrow tint. Don't worry; most common issues have simple solutions. It’s about being able to adjust and still achieve your desired look, which is pretty much part of any at-home beauty routine. Knowing what to do can save you a lot of worry.
If your brows turned out too dark, don't panic. You can try to lighten them slightly by gently scrubbing them with a mild soap or shampoo. Sometimes, a bit of makeup remover on a cotton pad can also help lift some of the excess color. Repeated gentle washing over a day or two can also help fade the color a little. This is a way to try and adjust the tint’s purpose after it’s been applied.
If the color is patchy or uneven, it usually means the tint wasn't applied evenly, or there was some oil or residue on the hairs that prevented the tint from sticking. You can wait a day or two, then reapply the tint to the lighter areas, making sure to clean and prep thoroughly this time. This is about putting the tint into service again, but with more precision.
For skin staining, if the petroleum jelly didn't quite catch all the tint, you can try using a bit of rubbing alcohol on a cotton swab to gently wipe away the stain. Be very careful not to get it in your eyes. Some people also find that a little bit of toothpaste can help lift tint stains from the skin, but always test a small area first. It's all about having a few tricks to employ for a cleaner finish.
If you experience any irritation, itching, or redness during or after tinting, immediately remove the tint with cool water and stop using the product. This could be a sign of a reaction, which is why the patch test is so important. Your comfort and safety are, obviously, the most important things here. Always prioritize your well-being.
Remember, practice truly helps you get better at this. The first time might feel a bit awkward, but each time you use Refectocil eyebrow tint, you’ll become more confident and precise. It’s about learning to employ the tools and product effectively for your personal beauty goals. You'll get the hang of it, seriously.

Detail Author:
- Name : Mrs. Ada Labadie Jr.
- Username : dedrick67
- Email : angelica93@gmail.com
- Birthdate : 1975-06-02
- Address : 6733 Ansel Falls New Nasirton, CT 21508-7620
- Phone : +17869203762
- Company : Jaskolski-Wolf
- Job : Logging Worker
- Bio : Blanditiis aut sit sunt dolorum culpa eum sunt. Quia animi ab aut molestiae et aut. Quia quo qui hic esse dolorum. Provident et et adipisci quis labore.
Socials
instagram:
- url : https://instagram.com/heidi.hackett
- username : heidi.hackett
- bio : Reprehenderit et aut quia vitae maxime. Vero voluptatem eius quas voluptas.
- followers : 4144
- following : 2337
linkedin:
- url : https://linkedin.com/in/hackett1993
- username : hackett1993
- bio : Dignissimos autem dolorum placeat sint.
- followers : 611
- following : 952
twitter:
- url : https://twitter.com/heidi_hackett
- username : heidi_hackett
- bio : Iste laudantium omnis doloribus deserunt aut. Rerum blanditiis quia reprehenderit nemo odio quaerat.
- followers : 4755
- following : 1258
