
Thinking about building amazing Internet of Things (IoT) projects with your Raspberry Pi? That's a really good idea! These tiny computers, you know, are making computing accessible and affordable for everyone. From big companies to someone just tinkering at their kitchen table, or even students learning to code in a classroom, the Raspberry Pi is a truly powerful tool. It lets you get started with computing for free, which is quite nice, and helps you create powerful programs along with exciting physical computing setups.
As more and more devices connect to the internet, keeping your data safe and sound becomes, well, very important. When your Raspberry Pi starts sending information back and forth for your IoT creations, you really want to make sure that connection is secure. This is where a Virtual Private Cloud, or VPC, comes into play. It gives your devices a private, protected space on the internet, almost like having your own dedicated network, which is rather reassuring.
This guide will walk you through how to set up your Raspberry Pi within a VPC for your IoT ventures. We will go through the steps, making sure you understand what you are doing, so you can build projects that are both clever and safe. You will learn how to connect your Raspberry Pi to a cloud environment, ensuring your data travels securely.
Table of Contents
- Why Use a VPC for Raspberry Pi IoT?
- What You Will Need
- Getting Your Raspberry Pi Ready
- Setting Up Your Virtual Private Cloud
- Connecting Your Raspberry Pi to the VPC
- Running IoT Applications Securely
- Frequently Asked Questions
- Next Steps for Your IoT Journey
Why Use a VPC for Raspberry Pi IoT?
When you build an IoT project, your Raspberry Pi might be gathering information from sensors, or maybe it's controlling lights, perhaps even managing a little robot. All of this activity means data is moving around. Sending this data over the regular internet can sometimes be risky, you know, if it is not protected.
A Virtual Private Cloud gives you a private space within a public cloud service. It's like having your own dedicated network segment, completely separate from other users. This setup lets you define your own network rules, control who can get in, and keep your IoT devices and the information they handle much safer. It really makes a difference for peace of mind.
For Raspberry Pi IoT projects, this means your devices can communicate with cloud services, other devices, or even your home network through a secure tunnel. This helps prevent unwanted access and protects sensitive data, which is rather important in today's connected world. It's a key part of making your projects truly reliable.
What You Will Need
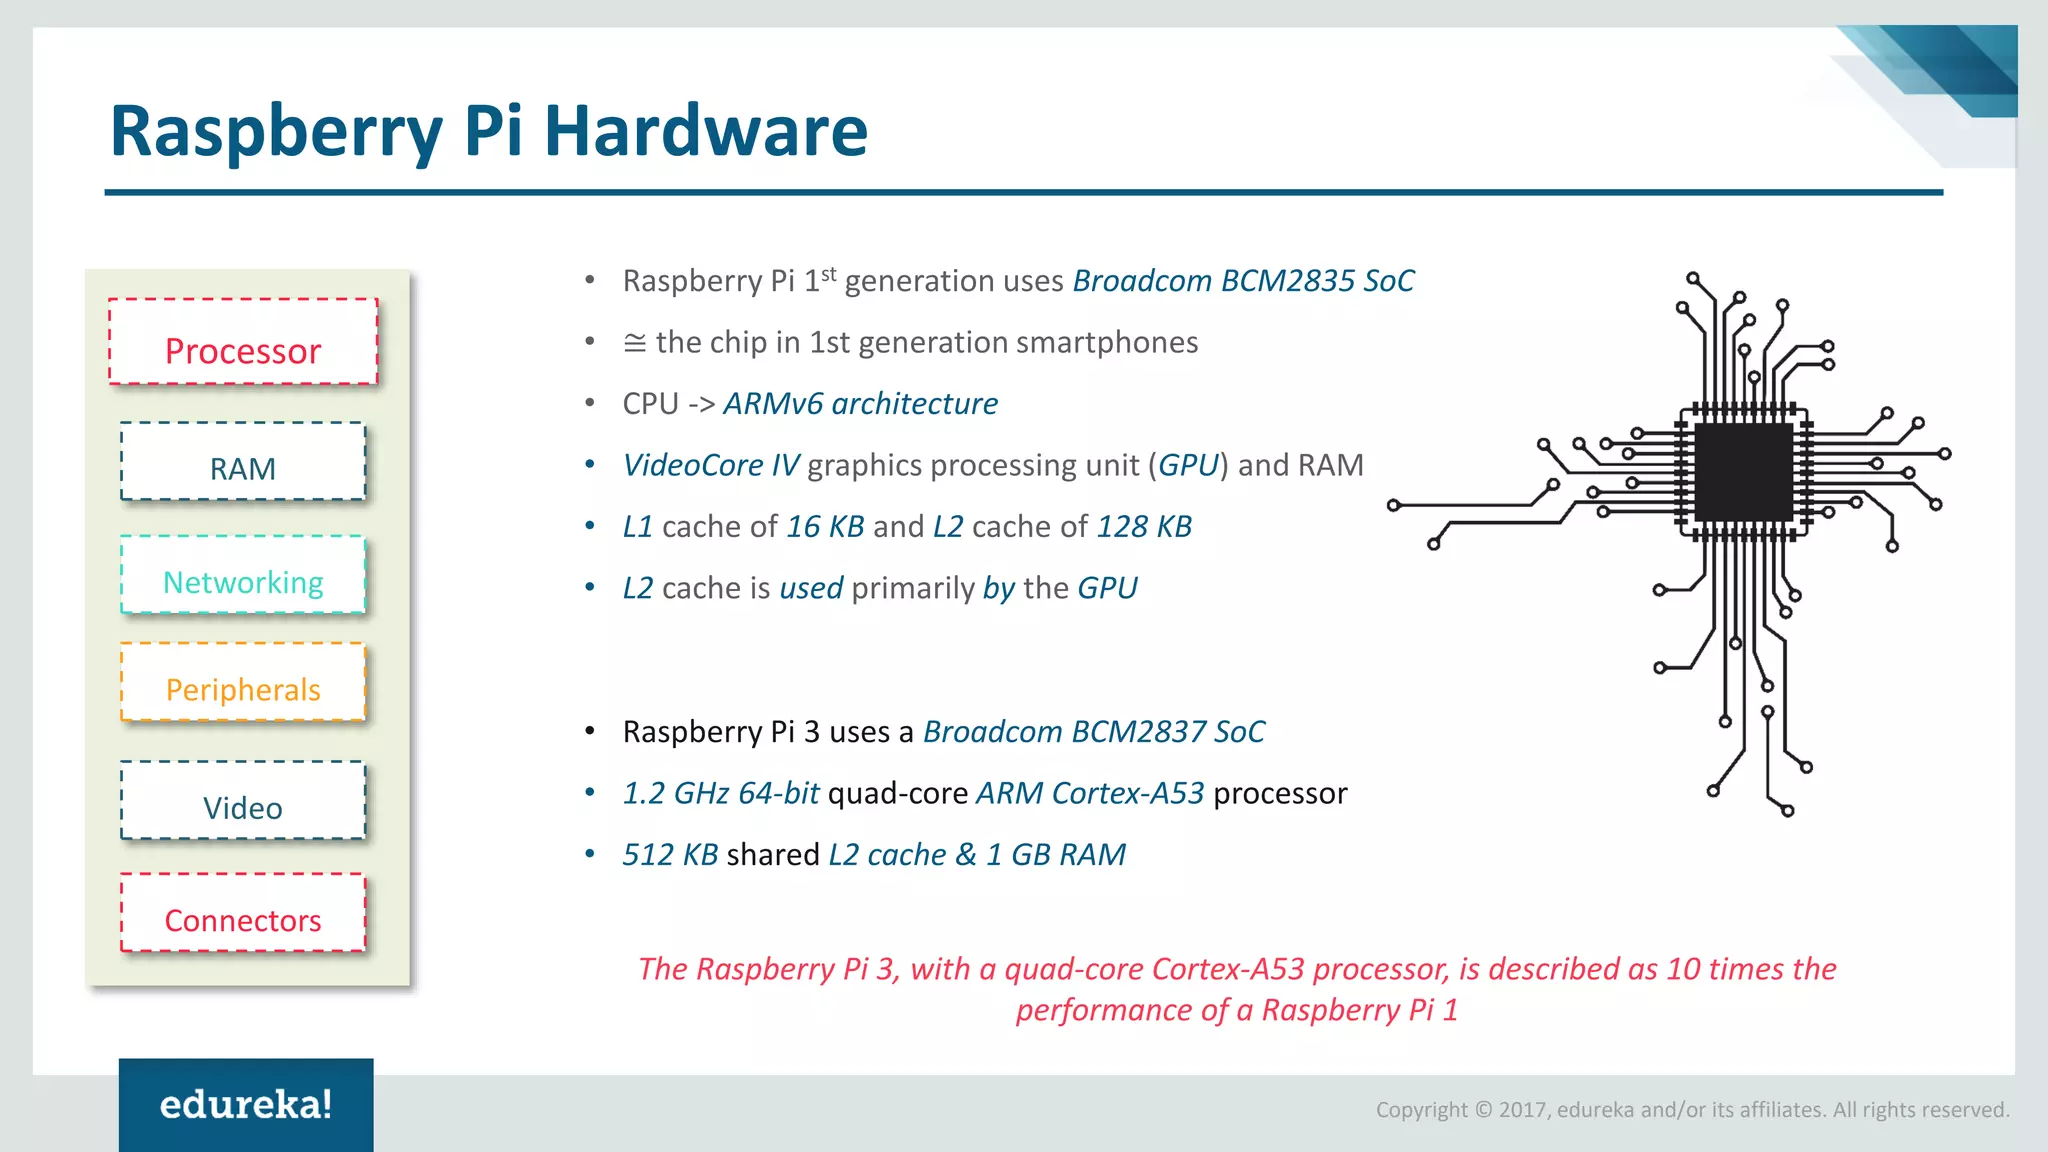
Before we get started, it's good to gather a few things. You will need a Raspberry Pi computer, of course, any recent model should do just fine. A power supply that works with your specific Pi is also a must, so you can keep it running.
You will also need a microSD card, at least 8GB, to put the operating system on. A card reader for your computer will help you get the system onto the card. An internet connection is pretty much essential for downloading software and getting your Pi online, too.
Access to a cloud service provider, like AWS, Google Cloud, or Azure, is also needed. This is where you will set up your Virtual Private Cloud. You will need an account with one of these providers, so you can create and manage your cloud resources.
Getting Your Raspberry Pi Ready
Our first step is to get your Raspberry Pi prepared for its role in your IoT project. This involves setting up the operating system and making sure everything is up to date. It is a very simple process, really, especially with the tools available.
Installing Raspberry Pi OS
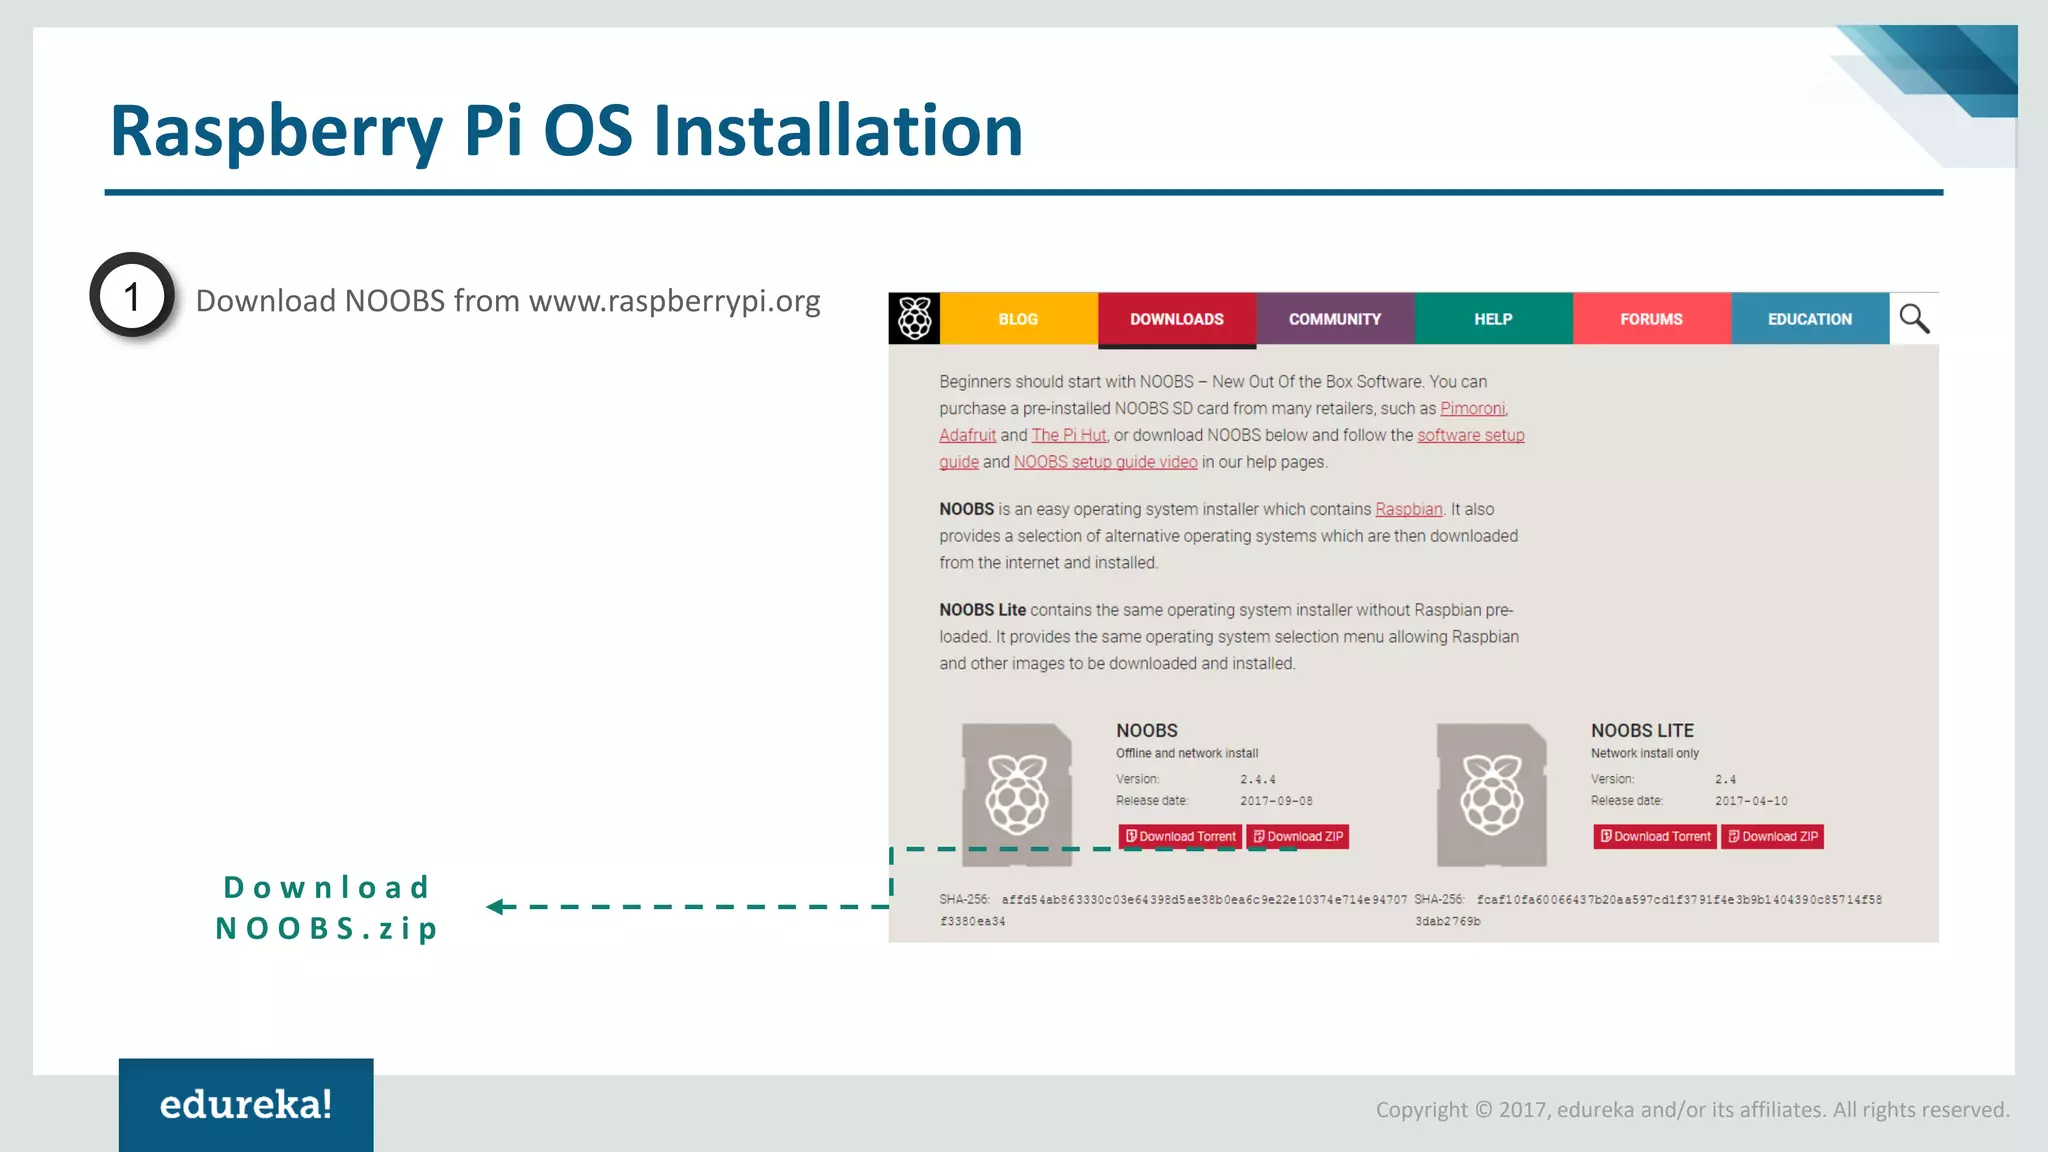
The easiest way to get your Raspberry Pi up and running is by using the Raspberry Pi Imager. This tool, you know, is a quick and easy way to install Raspberry Pi OS and other operating systems onto a microSD card. You can find it on the official Raspberry Pi website.
Just download the Imager to your computer, then put your microSD card into your card reader. Open the Imager, choose the Raspberry Pi OS (the recommended version is usually best), select your microSD card, and then click "Write." It will take a little while, but it is pretty straightforward.
Initial Setup and Updates
Once the operating system is on your microSD card, put the card into your Raspberry Pi. Connect a monitor, keyboard, and mouse, then plug in the power. Your Pi will boot up, and you will go through a first-time setup wizard. This wizard helps you set your country, language, and Wi-Fi network, which is very handy.
After the setup, it's a good idea to update your system. Open a terminal window on your Raspberry Pi. You can do this by clicking the terminal icon on the top bar. Then, type these commands, one after the other:
sudo apt updatesudo apt full-upgrade -yThese commands download the latest software updates and install them. This helps ensure your system has the newest features and security fixes, which is pretty important for any project. It might take a little while, depending on your internet speed.
Setting Up Your Virtual Private Cloud
Now that your Raspberry Pi is ready, we need to create the secure home for it in the cloud. This involves setting up the Virtual Private Cloud itself, then adding the necessary network components. This part is done through your chosen cloud provider's management console, so it's a bit different from working directly on the Pi.
Creating the VPC Itself
Log into your cloud provider's console. Look for the "VPC" service or section. Most providers have a "Create VPC" option. When you create it, you will need to give it a name, something like "MyIoTProjectVPC," and define a CIDR block. This block, you know, specifies the range of IP addresses for your private network. A common choice is `10.0.0.0/16`, which gives you plenty of addresses for your devices.
This initial step sets the boundaries for your private cloud space. It's like drawing the outline of your private property on the internet. All the resources you put inside this VPC will use IP addresses from this range, which is pretty neat.
Configuring Subnets and Internet Gateways
Inside your VPC, you will want to create subnets. Subnets are smaller divisions of your VPC's IP address range. You might create one public subnet for things that need to be directly accessible from the internet, and one private subnet for your IoT devices that should not be directly exposed. For instance, you could use `10.0.1.0/24` for a public subnet and `10.0.2.0/24` for a private one.
For your public subnet to connect to the internet, you need an Internet Gateway. Attach this gateway to your VPC. Then, create a route table for your public subnet that sends all internet-bound traffic (0.0.0.0/0) through this Internet Gateway. This allows your public resources, like a VPN server, to talk to the outside world, which is quite important.
For the private subnet, you typically route traffic through a NAT Gateway or a VPN server in the public subnet. This lets devices in the private subnet initiate outbound connections to the internet without being directly addressable from outside, adding a layer of security, so it is a good thing to consider.
Setting Up Security Groups and Network ACLs
Security Groups act as virtual firewalls for your instances (like your Raspberry Pi or a VPN server). You define rules that control inbound and outbound traffic. For example, you might allow SSH access (port 22) only from your home IP address, or allow VPN traffic (specific ports) from anywhere. This is a very important security measure, actually.
Network Access Control Lists (NACLs) are another layer of security, operating at the subnet level. They are stateless, meaning they apply rules to both inbound and outbound traffic independently. While Security Groups are often enough for most needs, NACLs offer an extra layer of control, which can be useful for very sensitive setups. You know, it's about having more options.
Connecting Your Raspberry Pi to the VPC
With your VPC ready, the next big step is to get your Raspberry Pi talking to it. This usually involves setting up a Virtual Private Network (VPN) connection from your Pi to a VPN server running within your VPC. This creates that secure tunnel we talked about earlier, so your data is protected.
Installing VPN Software on Your Pi
There are several VPN solutions you can use, but OpenVPN is a popular and reliable choice. First, you will need a VPN server running in your public subnet within the VPC. You can set up an EC2 instance (if using AWS) or a similar virtual machine, then install OpenVPN server software on it. This server will be the gateway for your Pi.
On your Raspberry Pi, open a terminal window again. You will install the OpenVPN client software. Type the following command:
sudo apt install openvpn -yThis command gets the necessary software onto your Pi. It's a pretty quick install, usually.
Configuring the VPN Connection
Once OpenVPN is installed on your Pi, you will need a client configuration file from your VPN server. This file, typically with a `.ovpn` extension, contains all the details your Pi needs to connect to the server securely. You will usually generate this on your VPN server and then transfer it to your Raspberry Pi. You can use `scp` or a USB drive for this, so that's an option.
Place this `.ovpn` file in a suitable directory on your Pi, perhaps in `/etc/openvpn/`. Then, you can start the VPN connection using a command like:
sudo openvpn --config /etc/openvpn/your_config_file.ovpnTo make the VPN connection start automatically when your Raspberry Pi boots up, you can enable the OpenVPN service. You might need to rename your configuration file to something like `client.conf` and place it in `/etc/openvpn/`. Then, use these commands:
sudo systemctl enable openvpn@clientsudo systemctl start openvpn@clientThis ensures your Pi is always connected to your VPC, which is quite convenient for IoT projects that need to be online constantly.
Testing the Connection
After setting up the VPN, it's a good idea to check if your Raspberry Pi is actually connected to the VPC. You can do this by looking at its IP address. In the terminal, type:
ip aLook for a new network interface, often named `tun0` or `tap0`. It should have an IP address from the CIDR block of your VPC's private subnet, which is pretty cool. This confirms your Pi is now part of your private cloud network.
You can also try to ping resources within your VPC, like your VPN server's private IP address, or other virtual machines you might have there. If the pings are successful, you know your connection is working well. This kind of testing is, you know, very important.
Running IoT Applications Securely
With your Raspberry Pi now securely connected to your VPC, you can start running your IoT applications with much greater confidence. The private network helps keep your data safe as it travels to and from the cloud. This setup is quite beneficial for many different kinds of projects.
Deploying Your IoT Code
You can write your IoT programs using languages like Python, which, you know, the Raspberry Pi Foundation offers free online courses for. Python is very popular for IoT because it is relatively easy to learn and has many libraries for working with sensors and cloud services. You can learn more about Python programming on our site.
Transfer your Python scripts or other application code to your Raspberry Pi. You can use `scp` or `rsync` for this, sending the files directly over your secure VPN connection. Once the code is on your Pi, you can run it just like any other program. Your IoT application can then communicate with cloud services or other devices within your VPC using their private IP addresses, which is quite secure.
Monitoring and Managing Your Devices
Since your Raspberry Pi is in a VPC, you can manage it remotely without exposing it directly to the public internet. You can use SSH to connect to your Pi from within your VPC, or from your local machine if your VPN client is active. This allows you to update software, check logs, or adjust your IoT application settings from anywhere, which is very convenient.
Cloud providers also offer monitoring tools that can track the health and performance of your virtual machines and network traffic within your VPC. You can set up alerts for unusual activity, which is a really good way to keep an eye on your IoT devices. This helps ensure your projects run smoothly and stay secure.
Frequently Asked Questions
Can a Raspberry Pi run IoT applications?
Absolutely, yes! A Raspberry Pi is, you know, a really popular choice for IoT applications. Its small size, low cost, and ability to connect to various sensors and actuators make it perfect for building smart devices. You can learn electronics and robotics for free online with the Raspberry Pi Foundation, which is quite helpful for these kinds of projects.
What is a VPC in the context of IoT?
A VPC, or Virtual Private Cloud, is a private network space that you set up within a public cloud provider's infrastructure. For IoT, it means your Raspberry Pi devices can communicate with cloud services and each other over a secure, isolated network. This helps protect your data and devices from unwanted access, which is very important for security.
How do I secure my Raspberry Pi IoT devices?
Securing your Raspberry Pi IoT devices involves several steps. Using a VPC and VPN, as we discussed, is a major one. You should also keep your Raspberry Pi OS updated, use strong, unique passwords, and consider disabling unnecessary services. The official documentation for Raspberry Pi computers and microcontrollers can provide more detailed security advice, which is pretty useful.
Next Steps for Your IoT Journey
Connecting your Raspberry Pi to a Virtual Private Cloud for your IoT projects is a really big step towards building secure and reliable smart systems. You have created a safe space for your devices to operate, which is a very good foundation.
Now that your Pi is securely connected, you can explore more advanced IoT concepts. Perhaps you will want to build exciting physical computing projects with our team of expert educators. You could also look into specific IoT platforms offered by your cloud provider, like AWS IoT Core or Google Cloud IoT Core, to manage your devices and data at scale. These platforms offer tools for device registration, message routing, and data analytics, which can be quite powerful. You can find more information about Raspberry Pi projects and resources to continue your learning.
Detail Author:
- Name : Miss Amie Nienow Jr.
- Username : dherman
- Email : legros.joanne@bosco.biz
- Birthdate : 2004-03-04
- Address : 6404 Langworth Stream South Wayne, OR 98989
- Phone : 469-721-9029
- Company : Weissnat-Eichmann
- Job : Rail Transportation Worker
- Bio : Non sed nam quod. Animi rem et omnis. Aliquid laborum ea reprehenderit incidunt reiciendis dolorem et.
Socials
instagram:
- url : https://instagram.com/freida2245
- username : freida2245
- bio : Fuga praesentium eum pariatur non laudantium. Quis enim quidem eaque magnam quod exercitationem.
- followers : 1485
- following : 1529
linkedin:
- url : https://linkedin.com/in/blickf
- username : blickf
- bio : Tempora alias aut in adipisci dolor.
- followers : 1730
- following : 342
