
Are you ready to unlock the full potential of your Raspberry Pi, transforming it from a local project into a global powerhouse accessible from anywhere in the world? It's almost like giving your little computer wings, so you can check on it, tinker with it, or even fix things up, no matter where you happen to be. This guide is going to show you a super helpful way to make that happen, making your Raspberry Pi projects much more flexible and, you know, just cooler.
For many folks, managing a Raspberry Pi means being right there with it, perhaps hooked up to a screen and keyboard. But what if you need to check on a sensor in your garden from your office, or adjust a home automation script while you're on vacation? That's where remote access comes into the picture, and it's a real game-changer for anyone working with these small but mighty devices. It means freedom, basically.
This comprehensive guide will walk you through the process of setting up and using RemoteIoT for remote Raspberry Pi access, complete with a free Windows download. We'll talk about how this powerful tool simplifies remote management, making it surprisingly easy to connect your Raspberry Pi directly from your PC browser or even your mobile device. So, let's get into it, shall we?
Table of Contents
- Why Remote Access Matters for Your Raspberry Pi
- What is RemoteIoT and Why It's a Great Choice
- Getting Started: Your Free RemoteIoT Download
- Step-by-Step: Setting Up RemoteIoT on Windows
- Connecting Your Raspberry Pi to RemoteIoT
- Security and Advanced Tips with RemoteIoT
- Unlocking More Potential with RemoteIoT
- Conclusion
- Frequently Asked Questions (FAQs)
Why Remote Access Matters for Your Raspberry Pi
Imagine your Raspberry Pi is running a weather station in your backyard, or perhaps it's acting as a little server for your smart home gadgets. You wouldn't want to trudge out to the backyard every time you need to check the data or make a quick change, would you? Of course not. Remote access means you can manage these devices from the comfort of your couch, or really, from anywhere with an internet connection. It's incredibly convenient, and you know, just makes life easier.
This capability opens up so many possibilities for your IoT projects. A Raspberry Pi that's stuck to a local network can only do so much, but one you can reach from far away? That's a different story. You can deploy it in tricky spots, monitor things from a distance, and even troubleshoot issues without needing to be physically present. This is especially useful for devices that are placed in hard-to-reach areas or those that need constant supervision, so it's a big deal for many people.
For example, if you have a Raspberry Pi controlling a plant watering system in your greenhouse, being able to access it remotely means you can adjust watering schedules based on current weather reports, even if you're away on a trip. This kind of freedom is what truly transforms your Raspberry Pi from a hobbyist's toy into a really powerful tool for all sorts of practical applications, and that's pretty cool, if you ask me.
What is RemoteIoT and Why It's a Great Choice
RemoteIoT is a powerful tool that simplifies remote management of your Raspberry Pi. Think of it as a friendly bridge that connects your computer or phone to your Raspberry Pi, no matter how far apart they are. It's designed to make the process of getting to your Pi's command line or even its graphical interface much, much simpler, which is really what many people are looking for. This guide will walk you through everything you need to know about Raspberry Pi RemoteIoT, including its features, setup process, and how to download it for free.
One of the best things about RemoteIoT is that it provides seamless access to your Raspberry Pi remotely. The web console, for instance, lets you connect your Raspberry Pi directly from your PC browser or mobile device. This web console is, you know, a standard terminal emulator for the X Window System, which means you get a familiar environment to work in, just like you were sitting right in front of your Pi. It's a very straightforward approach that removes a lot of the typical headaches associated with remote connections.
This comprehensive guide will also delve into everything you need to know about how to remotely access Raspberry Pi using RemoteIoT, including where to find the free download and how to set it up effortlessly. It's an excellent solution for anyone who wants to manage their IoT projects and devices without complicated network configurations. Basically, it takes a lot of the fuss out of remote control, which is rather nice.
Key Features That Make RemoteIoT Stand Out
RemoteIoT comes with a set of features that make it a really appealing option for remote Raspberry Pi access. First off, there's the web console. This means you don't need any special software on your client device, just a regular web browser. You can be on your desktop computer, a laptop, or even your phone, and still get full access to your Pi's terminal. That's pretty convenient, if you ask me.
Another key aspect is its focus on simplifying the connection process. This comprehensive guide will walk you through the process of connecting a remote IoT device, specifically a Raspberry Pi, in a P2P (peer-to-peer) environment. This P2P setup often helps bypass tricky router settings and firewalls, making it easier to establish a connection even if your Raspberry Pi is behind a network address translator (NAT), which is often a big hurdle for people.
Also, RemoteIoT often incorporates SSH (Secure Shell) capabilities. We'll delve into how SSH enhances security, providing a secure, encrypted channel for your remote sessions. This is very important for protecting your data and your Raspberry Pi from unauthorized access. Plus, the fact that it's free to download for Windows users is, you know, a huge bonus for many people looking to get started without extra costs.
Getting Started: Your Free RemoteIoT Download
So, you're ready to get your hands on RemoteIoT and start managing your Raspberry Pi from anywhere. The good news is that it's available as a free download, which is pretty awesome. This section provides a detailed guide on how to remotely access Raspberry Pi with RemoteIoT free download for Windows and how to install and configure it on both your Windows machine and your Raspberry Pi. It's actually quite straightforward, honestly.
If you're looking to download Raspberry Pi RemoteIoT for free, this guide will walk you through everything you need to know, from understanding its features to installing it on your system. It's important to make sure you get the right version and that your system meets the basic requirements, so you don't run into any snags later on. We'll cover all that, don't worry.
Getting the software is the first big step towards making your Raspberry Pi a truly global device. By following the steps outlined in this guide, you'll be well on your way to seamless remote management, which is very exciting for anyone with IoT projects. Just make sure you're getting it from a reliable source, as that's always a good practice, you know?
Where to Find the Free Download
Finding the free download for RemoteIoT is, in a way, the starting point for this whole adventure. You'll typically find it on the official RemoteIoT website or a reputable platform that hosts IoT tools. A quick search for "RemoteIoT free download" should point you in the right direction. Always make sure you're downloading from a trusted source to avoid any unwanted software or security risks, which is, you know, just common sense.
This comprehensive guide will tell you everything you need to know about how to remotely access Raspberry Pi using RemoteIoT, including where to find the free download. Sometimes, you might find it linked directly from forums or communities dedicated to Raspberry Pi and IoT projects. These communities can also be a great resource for tips and troubleshooting, so it's good to keep them in mind, too.
Once you locate the download page, you'll usually find a clear button or link to get the Windows installer. Remember, RemoteIoT offers an excellent solution, providing seamless access to your Raspberry Pi remotely, and the best part? It's free to download for Windows users. So, just click that button, and you're pretty much ready for the next step.
System Requirements for RemoteIoT
Before you hit that download button, it's a good idea to quickly check if your computer and Raspberry Pi meet the necessary requirements for RemoteIoT to run smoothly. For the Windows client, you'll typically need a modern version of Windows (like Windows 10 or 11) and a decent amount of RAM and processor power, but nothing too demanding, honestly. Most average computers today will handle it just fine.
On the Raspberry Pi side, RemoteIoT is generally compatible with various models, from the Raspberry Pi 3 B+ up to the latest Pi 4 or 5. You'll need a working Raspberry Pi OS (formerly Raspbian) installation, and it's always a good idea to have it updated to the latest version. This helps ensure compatibility and provides the most recent security patches, which is, you know, a very good practice.
Make sure your Raspberry Pi has a stable internet connection, either through Wi-Fi or an Ethernet cable, as this is, obviously, crucial for remote access. Having enough free space on your SD card is also important for the RemoteIoT agent installation. These are fairly standard requirements for most Raspberry Pi projects, so you're probably already set up, more or less.
Step-by-Step: Setting Up RemoteIoT on Windows
This section provides a detailed guide on how to remotely access Raspberry Pi with RemoteIoT free download for Windows and how to install and configure it on your PC. It's a fairly straightforward process, but going through each step carefully will help ensure a smooth setup. You know, sometimes it's the little things that trip people up, so we'll try to be very clear.
Once you've downloaded the installer, you're pretty much ready to begin. The installation process is similar to installing any other Windows application, so if you've ever installed software before, you'll find this very familiar. Just a few clicks, and you'll be well on your way to getting RemoteIoT up and running on your computer. It's actually quite simple, you'll see.
Then comes the initial configuration, which involves setting up your RemoteIoT account and preparing the software to connect with your Raspberry Pi. This part is crucial for establishing a secure and reliable link between your Windows machine and your remote device. So, let's get into the specifics of how to get everything properly installed and configured, shall we?
Installation Process
After downloading the RemoteIoT installer for Windows, find the downloaded file, which will likely be an .exe file, and double-click it to start the installation wizard. You'll typically be greeted by a setup window, so just follow the on-screen prompts. This usually involves agreeing to terms, choosing an installation location (the default is often fine), and clicking "Next" a few times. It's, you know, the usual routine for software installation.
The wizard will then copy the necessary files to your computer and set up the program. This process usually takes just a few moments, depending on your system's speed. Once the installation is complete, you'll likely see a confirmation message, and there might be an option to launch RemoteIoT right away. It's a pretty quick and painless part of the whole process, actually.
If you're looking to download Raspberry Pi RemoteIoT for free, this guide will walk you through everything you need to know, from understanding its features to installing it on your Windows machine. So, once it's installed, you're ready to move on to getting it configured and ready to talk to your Raspberry Pi, which is the really exciting part, in a way.
Initial Configuration
Once RemoteIoT is installed, launch the application. The first time you open it, you might be prompted to create an account or log in. This account is what helps manage your remote devices and keeps your connections secure. So, you know, go ahead and follow the steps to set up your account, providing any required information like an email address and a password. This is a pretty standard procedure for online services.
After logging in, you'll typically be presented with a dashboard or a screen where you can add new devices. This is where you'll tell RemoteIoT about your Raspberry Pi. You'll likely need to generate a unique key or code that you'll later use on your Raspberry Pi to link it to your RemoteIoT account. Keep this key safe, as it's what establishes the secure connection, which is, you know, quite important.
This initial setup on your Windows computer is crucial for getting everything talking to each other. By following these steps, you're basically preparing your command center for remote access. The software is designed to simplify remote management, so even this configuration step is pretty user-friendly, which is rather nice. It's all about making things easy, you see.
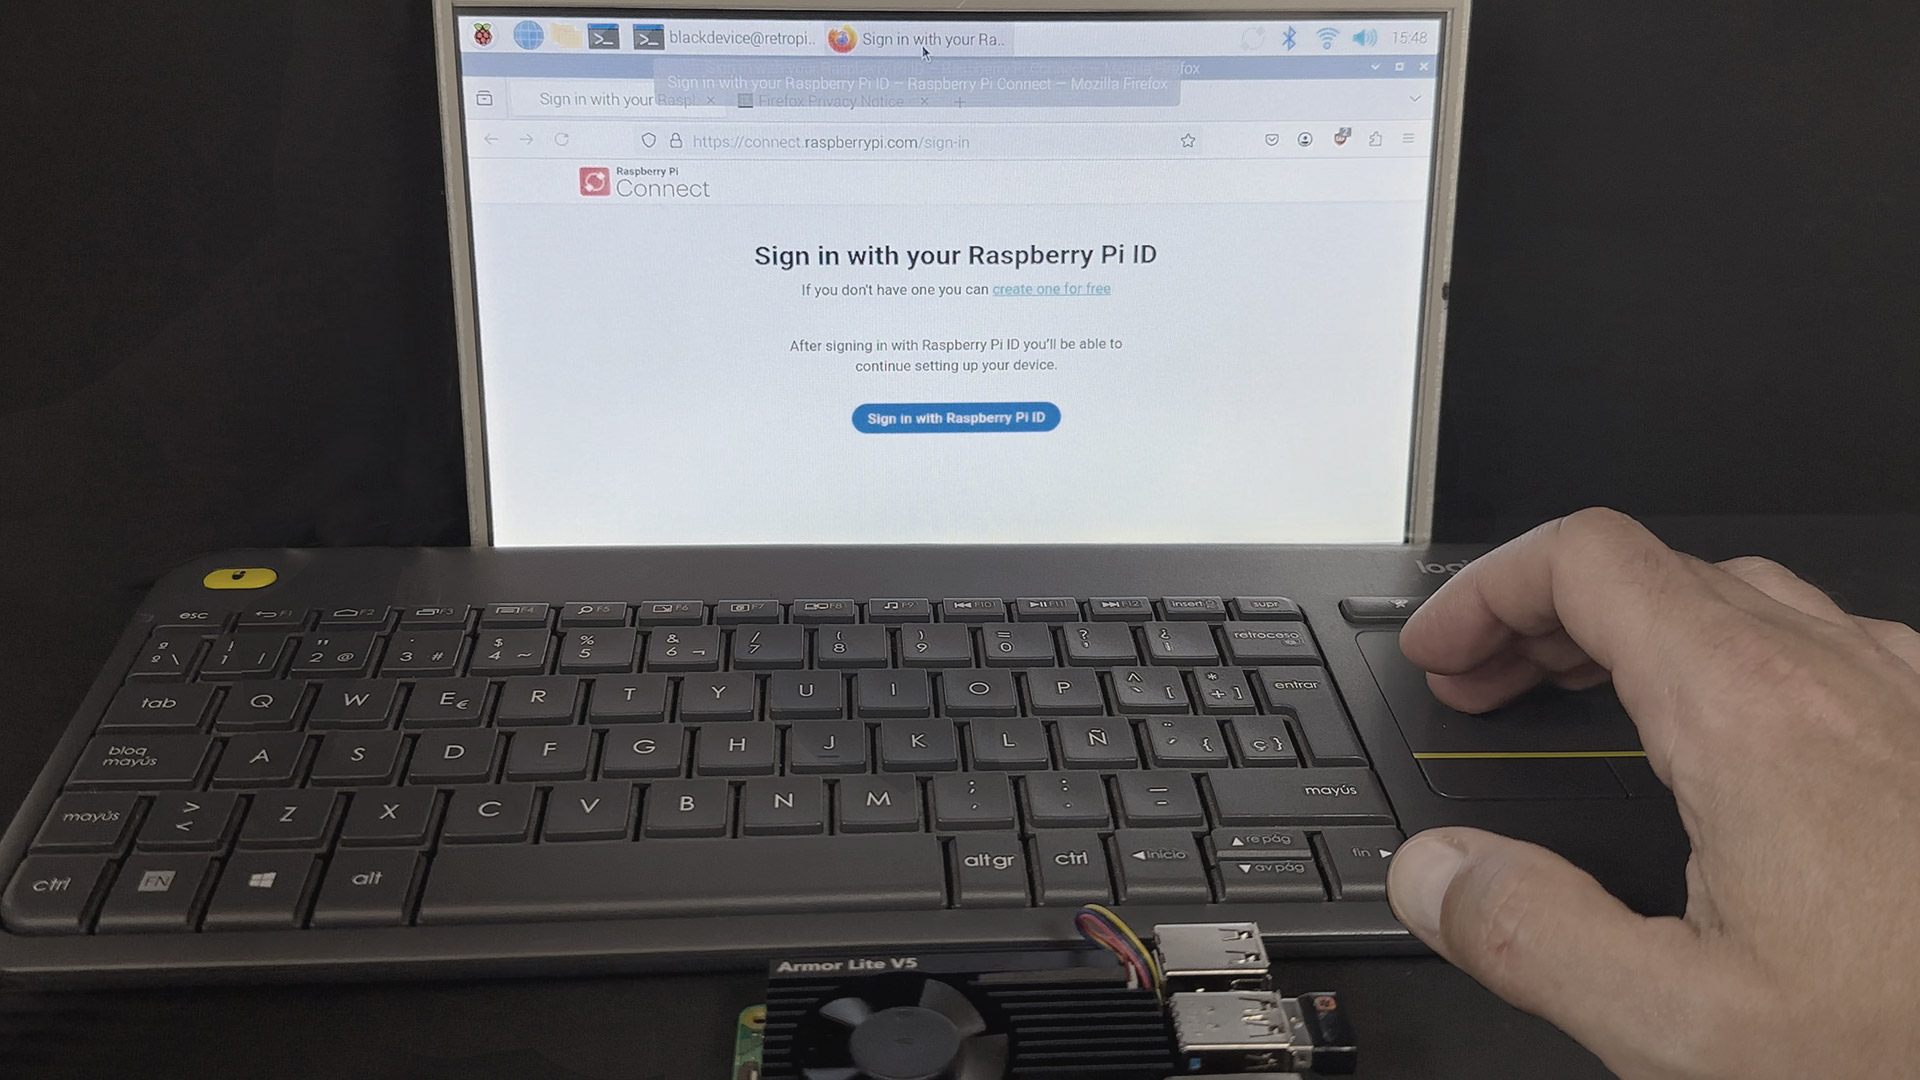
Connecting Your Raspberry Pi to RemoteIoT
Now that RemoteIoT is set up on your Windows computer, the next big step is to get your Raspberry Pi ready and link it to your RemoteIoT account. This is where the magic really happens, allowing your Pi to become accessible from anywhere. This comprehensive guide will walk you through everything you need to know about SSH RemoteIoT for Raspberry Pi, focusing on how you can get started with a free download and connect your device. It's a very satisfying part of the process, you know.
The process involves a few steps on your Raspberry Pi itself, primarily installing a small agent or client software that allows it to communicate with the RemoteIoT service. This agent is what tells your Pi to listen for commands and send data back to your RemoteIoT dashboard. It's actually a pretty clever system, if you think about it.
Once the agent is installed and configured with the unique key from your RemoteIoT account, your Raspberry Pi will appear online in your RemoteIoT dashboard. From there, you can start using the web console to send commands, check status, and do all sorts of remote management tasks. It's surprisingly simple, and you'll be amazed at what you can do, so it's worth the effort.
Preparing Your Raspberry Pi
Before you install the RemoteIoT agent, make sure your Raspberry Pi is up and running with a fresh, updated installation of Raspberry Pi OS. You'll want to open a terminal window on your Pi (either directly or via a local SSH connection if you prefer) and run the usual update commands. This ensures all your system packages are current, which is, you know, a good foundation for any new software installation.
sudo apt update
sudo apt upgrade -y
Next, you'll need to download the RemoteIoT agent script or package to your Raspberry Pi. The exact command will be provided by the RemoteIoT platform itself, usually on the "add device" page after you've set up your account on Windows. It's typically a simple `wget` command that pulls the installation script directly onto your Pi. This is a pretty common way to install things on Linux systems, actually.
Once the script is downloaded, you'll run it, likely with `sudo`, and it will guide you through the agent installation. During this process, you'll be asked for that unique key or token you obtained from your RemoteIoT account on your Windows computer. This is how your Raspberry Pi knows which account to link to, which is, obviously, very important for security and proper functioning.
Establishing the Connection
After the RemoteIoT agent is successfully installed and configured on your Raspberry Pi, it will attempt to connect to the RemoteIoT service. You should then see your Raspberry Pi appear in your RemoteIoT dashboard on your Windows computer, indicating that it's online and ready for remote access. This is a pretty satisfying moment, you know, when everything just clicks into place.
The connection is often established in a P2P environment, as mentioned earlier. This means that, in many cases, you won't need to mess with port forwarding on your router, which is a huge relief for many people who find network configurations a bit daunting. Discover how to set up remote IoT behind a router using Raspberry Pi with a free download guide, which simplifies this aspect quite a bit.
If for some reason your Pi doesn't appear online, double-check your internet connection on the Pi, and make sure the unique key you entered during the agent setup was correct. Sometimes a simple reboot of the Raspberry Pi can also help establish the connection. But generally, it's a pretty smooth process, so you shouldn't have too much trouble.
Using the Web Console
With your Raspberry Pi connected to RemoteIoT, you can now truly experience the ease of remote management. The primary way you'll interact with your Pi through RemoteIoT is via its web console. This web console, as I mentioned, is a standard terminal emulator for the X Window System, so it feels just like you're using a regular terminal, but it's all happening in your browser. It's pretty neat, actually.
To access it, simply go to your RemoteIoT dashboard on your PC browser or mobile device, select your connected Raspberry Pi, and look for an option to open the web console or terminal. A new tab or window will likely open, showing you the familiar command line interface of your Raspberry Pi. From here, you can run any command you would normally run if you were physically connected to your Pi, so it's very powerful.
This means you can install software, update packages, run Python scripts, check system logs, or even reboot your Pi, all from a distance. The convenience of having this access from any device with a web browser is, you know, truly remarkable. It really does transform your local project into a global powerhouse, accessible from anywhere in the world, which is the whole point, really.
Security and Advanced Tips with RemoteIoT
While the ease of use with RemoteIoT is a major draw, it's also important to think about security when you're accessing devices remotely. Any time you open up a connection to your Raspberry Pi from the internet, you want to make sure it's done safely. This guide will walk you through everything you need to know about Raspberry Pi RemoteIoT, including its features and setup process, but also touches on important security aspects. It's, you know, just good practice to be mindful of these things.
RemoteIoT is designed to provide a secure connection, often leveraging technologies like SSH. We'll explore how SSH enhances security, making sure your data is encrypted and your connection is protected from prying eyes. Additionally, we'll discuss where to find more information on securing your remote IoT setup, especially if your Raspberry Pi is located behind a router or a more complex network. These are pretty important considerations for anyone serious about their IoT projects.
Understanding how to properly secure your remote access is just as important as knowing how to set it up. A little bit of knowledge here can save you a lot of headaches down the line. So, let's look at some key security features and a few advanced tips for getting the most out of RemoteIoT, shall we?
SSH and Enhanced Security
When you're remotely accessing your Raspberry Pi, especially over the internet, security is a big deal. RemoteIoT, in many ways, helps with this by often using SSH (Secure Shell) as the underlying protocol for its connections. SSH creates an encrypted tunnel between your client device and your Raspberry Pi, which means that all the data passing back and forth is scrambled and protected. This is, obviously, a very good thing for your privacy and safety.
In this comprehensive guide, we'll explore how you can download and set up a free remote IoT platform on your Raspberry Pi, and we'll delve into how SSH enhances security. It means that even if someone were to intercept your connection, they wouldn't be able to read your commands or the output from your Pi. It's like having a secret, coded conversation, which is, you know, quite reassuring.
Beyond the inherent security of SSH, always make sure you're using strong, unique passwords for your Raspberry Pi and your RemoteIoT account. Some users even opt for SSH key-based authentication for an extra layer of security, which is, you know, a bit more advanced but very effective. These practices collectively help keep your Raspberry Pi and your data safe from unauthorized access, and that's pretty important, actually.
RemoteIoT Behind a Router
One of the common challenges people face with remote access is getting through their home or office router. Routers act as a firewall, protecting your internal network from the outside world. This is great for security, but it can make direct connections to devices like your Raspberry Pi tricky. However, RemoteIoT often simplifies this, especially with its P2P capabilities. This comprehensive guide will walk you through everything you need to know about how to set up remote IoT behind a router using Raspberry Pi with a free download guide. It's actually quite clever how it works.
Traditional methods for remote access often require "port forwarding," where you tell your router to direct specific incoming traffic to your Raspberry Pi. This can be complex and, if not done correctly, can even pose security risks. RemoteIoT's P2P approach tries to bypass the need for manual port forwarding by establishing a direct connection between your client and your Pi, often through an intermediary server. This makes things much, much easier for the average user, which is, you know, a big plus.
While RemoteIoT aims to make this seamless, understanding the basics of your network setup can still be helpful for troubleshooting. If you ever run into connection issues, checking your Raspberry Pi's network settings or even your router's firewall rules might be a good idea. But generally, RemoteIoT is designed to just work, even when your Pi is behind a router, which is rather convenient.
Unlocking More Potential with RemoteIoT
Remotely accessing your Raspberry Pi using RemoteIoT is a powerful way to manage your IoT projects and devices. But it's not just about running terminal commands. Once you have this reliable remote connection, you can start thinking bigger about what your Raspberry Pi can do. It's like having a whole new set of tools at your disposal, which is pretty exciting, you know.
For example, you could use the remote access to deploy updates to your smart home system while you're away, or collect data from sensors in a remote location without having to physically visit. This guide will walk you through everything you need to know about remotely accessing your Raspberry Pi, including a free download of RemoteIoT, a powerful tool designed to help you achieve these kinds of things. It really does open up a lot of doors for your projects.
By following the setup guide, utilizing its key features, and keeping security in mind, you'll find that RemoteIoT significantly enhances your ability to work with your Raspberry Pi. It transforms it from a device tied to your local network into a truly global component of your IoT ecosystem. So, you know, go ahead and explore all the amazing things you can do with this newfound remote control.
Conclusion
In this comprehensive guide, we've explored how you can download and set up a free remote IoT platform on your Raspberry Pi, specifically focusing on RemoteIoT. We walked through the steps of getting the free download for Windows, installing it on your PC, and then preparing and connecting your Raspberry Pi. We also touched on the importance of security, especially how SSH helps keep your connections safe, and how RemoteIoT simplifies connecting devices even when they are behind a router. It's been quite a journey, actually, and hopefully a helpful one.


Detail Author:
- Name : Vinnie Rodriguez IV
- Username : guadalupe11
- Email : grady.roma@effertz.com
- Birthdate : 1995-01-01
- Address : 8520 Heathcote Vista Santinoton, WY 85845-6204
- Phone : +1 (563) 905-7010
- Company : Ferry LLC
- Job : Electrical Power-Line Installer
- Bio : Rem occaecati molestiae et ad excepturi aperiam. Sunt sapiente est in repudiandae eveniet velit. Fugiat fuga dolorum in natus aut. Dolorem fugit eaque culpa porro corporis corporis assumenda.
Socials
instagram:
- url : https://instagram.com/prudence.greenholt
- username : prudence.greenholt
- bio : Dolores sequi deleniti velit quae et laudantium. Dolorem fugiat rerum facere.
- followers : 2398
- following : 1686
facebook:
- url : https://facebook.com/prudence8461
- username : prudence8461
- bio : Eum quos et veritatis.
- followers : 5932
- following : 1784
twitter:
- url : https://twitter.com/greenholtp
- username : greenholtp
- bio : Voluptates aut est quas perferendis qui. Enim laborum ratione ab aliquid rerum magni illo quia. Provident veritatis dolore facere natus qui ut consequuntur.
- followers : 5311
- following : 2985
tiktok:
- url : https://tiktok.com/@greenholt2017
- username : greenholt2017
- bio : Earum facere et mollitia sed. Delectus quae molestiae laboriosam perspiciatis.
- followers : 1033
- following : 1088
linkedin:
- url : https://linkedin.com/in/prudence_greenholt
- username : prudence_greenholt
- bio : Nostrum molestias consequatur quia ea.
- followers : 5186
- following : 2751
